Mailtrain
Mailtrain is an open source application that allows you to create email campaigns without having to use third party services, thus preserving the privacy of our community. It offers a very easy and intuitive interface for creating new lists, configuring subscription and sending parameters, as well as many other useful options. All the instructions for use, with images, are included in the same tool. In this tutorial, we just give indications for the general configuration of the tool, so you can connect to the mail server and send the messages to the lists.
Installation
Before proceeding with the installation it is necessary to choose the domain or sub-domain under which the application will be hosted. We’ll use the news.example.com subdomain as an example.
We will have to create a DNS record type A that points to the server’s IP.
news.example.com A IP.OF.YOUR.SERVER
Depending on your domain provider, it may take a few minutes and a few hours for the DNS to propagate. Once the DNS are propagated you can proceed with the installation from the control panel.
Go to the page ‘Install applications’, check the box ‘Select’ on Mailtrain, a field will be displayed in which you will have to insert the name of the domain/subdomain you want to use to install the application. In the case of our example it will be news.example.com. Proceed with the installation by clicking on the ‘Install’ button.
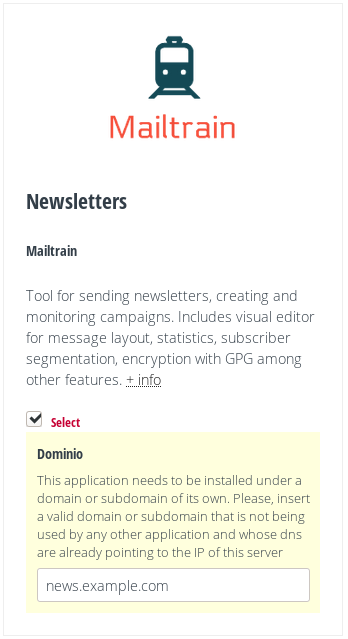
Mailtrain installation.
Change your password
In the installation process, Mailtrain creates the administrator account, assigning it as default password: ‘test’. Unfortunately, when you access the application for the first time, there is no warning or reminder that invites you to change this password. The first thing you will have to do is replace the default password with one of your own.
It is also advisable to assign a valid email account, associated with this account, which will allow you to receive notifications, or to recover the password in case of loss. You can make both changes from the ‘Account’ page, which you can access from the drop-down menu on the top right.
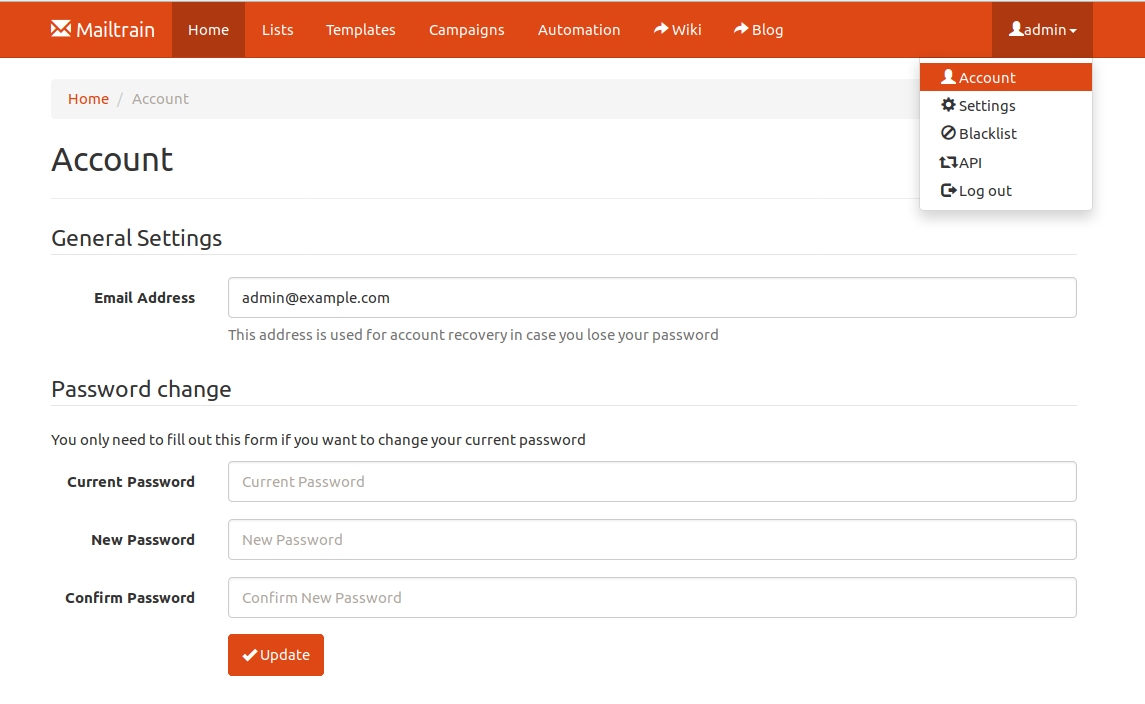
Change your password.
General setup
On the ‘Settings’ page, enter the address under which your Mailtrain installation can be visited, that is the application’s installation domain. In the case of our example it will be https://news.example.com. You will also have to modify the ‘Admin Email’ parameter so that system notifications can be sent correctly.
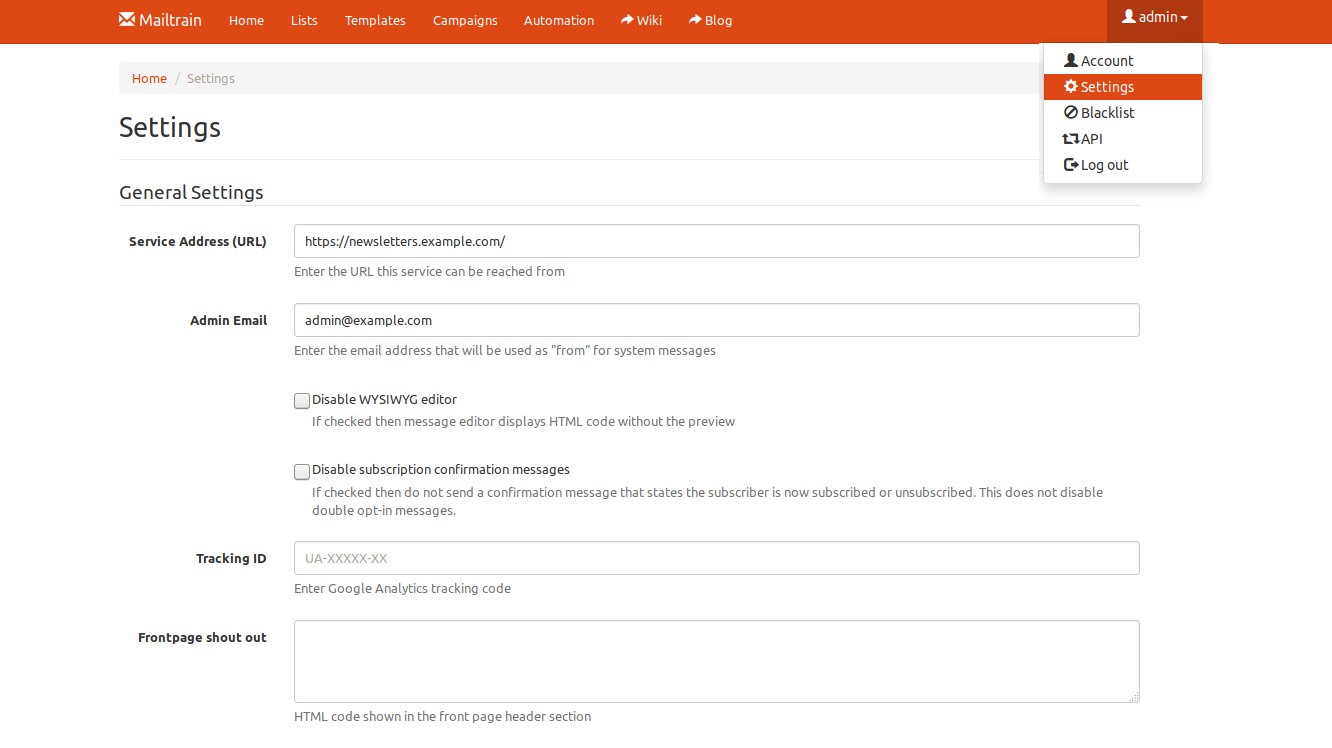
General settings.
Further down on the same page, you’ll have to tell Mailtrain how to send the emails. Mailtrain does not include a mail server of its own, so you need to insert the necessary parameters to be able to use an existing mail server and a valid account. With MaadiX you have a default mail server, so we will link Mailtrain to this same server, using an email account that you have previously created.

Email server settings.
Select SMTP for sending.
Hostname: the full name of your server.
Port: 465
Encryption: Use TLS — usually selected for port 465.
Insert a valid email account and password to send the newsletters
You can check if your configuration is correct by clicking on the ‘Check Mailer Config’ button.