Mailman
Introduction
Mailman is a software that allows you to create and manage mailing lists and newsletters, which consists of three different web interfaces.
Administration
List management
List Archive
Installation
From the Control Panel, go to the ‘Install Applications’ section, there you will see all the applications available to install, including Mailman. Just check the box ‘Select’ and enter a password to assign to the Mailman administration account. Save it somewhere safe as it will not be sent by mail for security reasons. Once you have specified it you can click on the ‘Install’ button.
After a few minutes you will receive an email (to the address you have set up for the Control Panel administration account) confirming that the installation was completed successfully.
Setting up domain
Mailing lists operate under their own domain or sub-domain. Therefore, you will need to have your own domain and access to its ‘DNS zone editor’ (External operation to MaadiX: remember that MaadiX is not a domain provider nor offers a DNS zone editor).
Also, you have to remember that you cannot create mailing lists using the same domain you are using for email accounts, this could cause problems. That is, in the case that you are using the domain example.com for email accounts (admin@example.com, info@example.com…), you cannot use it to create mailing lists. What you will have to do is create a subdomain of example.com (for example, lists.example.com) and configure the DNS for this domain or subdomain before starting to create lists.
Activating domain or subdomain in Mailman
The Mailman interface can be accessed at https://myserver.maadix.org/mailman or at https://myserver.example.com/mailman (if you have configured your own domain for the server) and login to the administration account using the password you assigned during installation.
Once authenticated the ‘Domains’ tab will appear in the top menu. Access this page and click on the ‘Add Domain’ button.
As an example we will use lists.example.com, but you can assign the name you prefer (news.example.com, info.example.com…).
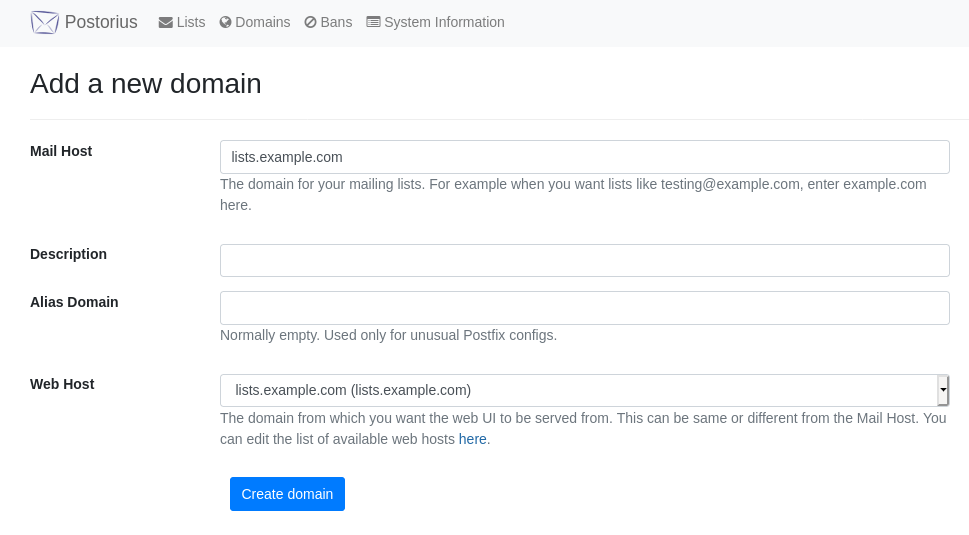
Adding a new domain.
You will have to fill in the following three fields:
Mail Host: the name of the domain or subdomain under which lists can be created (in our case lists.example.com, for which we will then have to create the corresponding DNS entries).
Description: a description for the domain or sub-domain (optional).
Alias Domain: You can leave it empty.
Web Host: the web address where it will be possible to access the options for the lists of this subdomain. You can leave the default value of mynamemaadix.maadix.org or add another domain or subdomain, provided that it is activated in the control panel and it works correctly. This will be the web address that will be sent to subscribers for actions such as confirming subscription, viewing public lists, or others.
In the case of this example, the Web Host could be the domain example.com or even the same subdomain lists.example.com, which must have the DNS correctly configured to point to your server, and it will have to be activated in the control panel. If you decide to use the same domain or subdomain as lists as the address for the graphical interface, it is very important that you do not activate the mail server for it. You must then activate the subdomain lists.example.com in the control panel, within the section ‘Add Domains’, without checking the box ‘Activate mail server for this domain’.
De esta forma, se creará la configuración necesaria para que el subdominio listas.example.com se pueda visitar desde el navegador, sin que se active el servidor de correo. Si activaras el servidor de correo para un dominio que quisieras utilizar para las listas, podrías experimentar problemas en la entrega de los mensajes.
Enable DKIM
Go to the control panel and consults the My Applications tab > Mailman > Lists’ Domains in the menu on the left column. You will see a list of all domains added from Mailman. From this same page you can activate the DKIM key for domains you have created from the Mailman interface. Remember that the DKIM key is important to prevent sent emails from ending up in the SPAM folder. You can find more information about DKIM on the following page: DNS - DKIM Record.
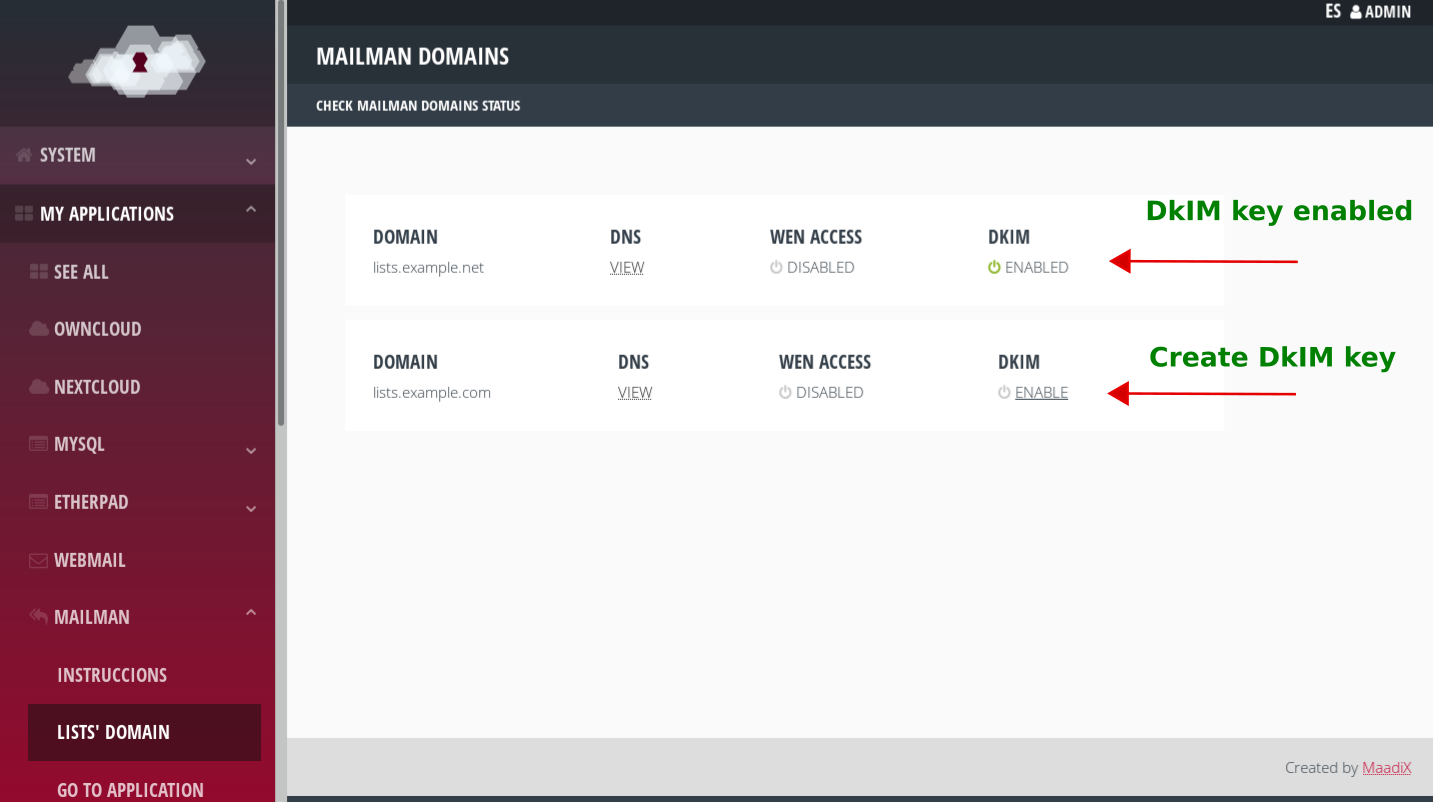
Enabling DKIM key.
Configure DNS for the domain or sub-domain
For the created lists to work properly, it is necessary to configure the DNS for the added domain or subdomain.
As a first step, you need to access through the control panel the required values for the DNS records. The control panel will automatically detect the domains or subdomains activated from Mailman and will return the correct values for the DNS entries, which you will have to configure in the panel provided by your domain provider (operation external to MaadiX).
From the page My Applications > Mailman > Lists’ Domains in the left column menu you access the list of all domains added from Mailman.
Click the ‘View’ link in the DNS column of the domain or subdomain you wish to configure.
Here you will find the necessary DNS values for a correct configuration. If you only want to use this domain or sub-domain for mailing lists, you only need to configure the DNS for the MX, TXT and DKIM values, which you will find in the ‘Mail Server’ table.
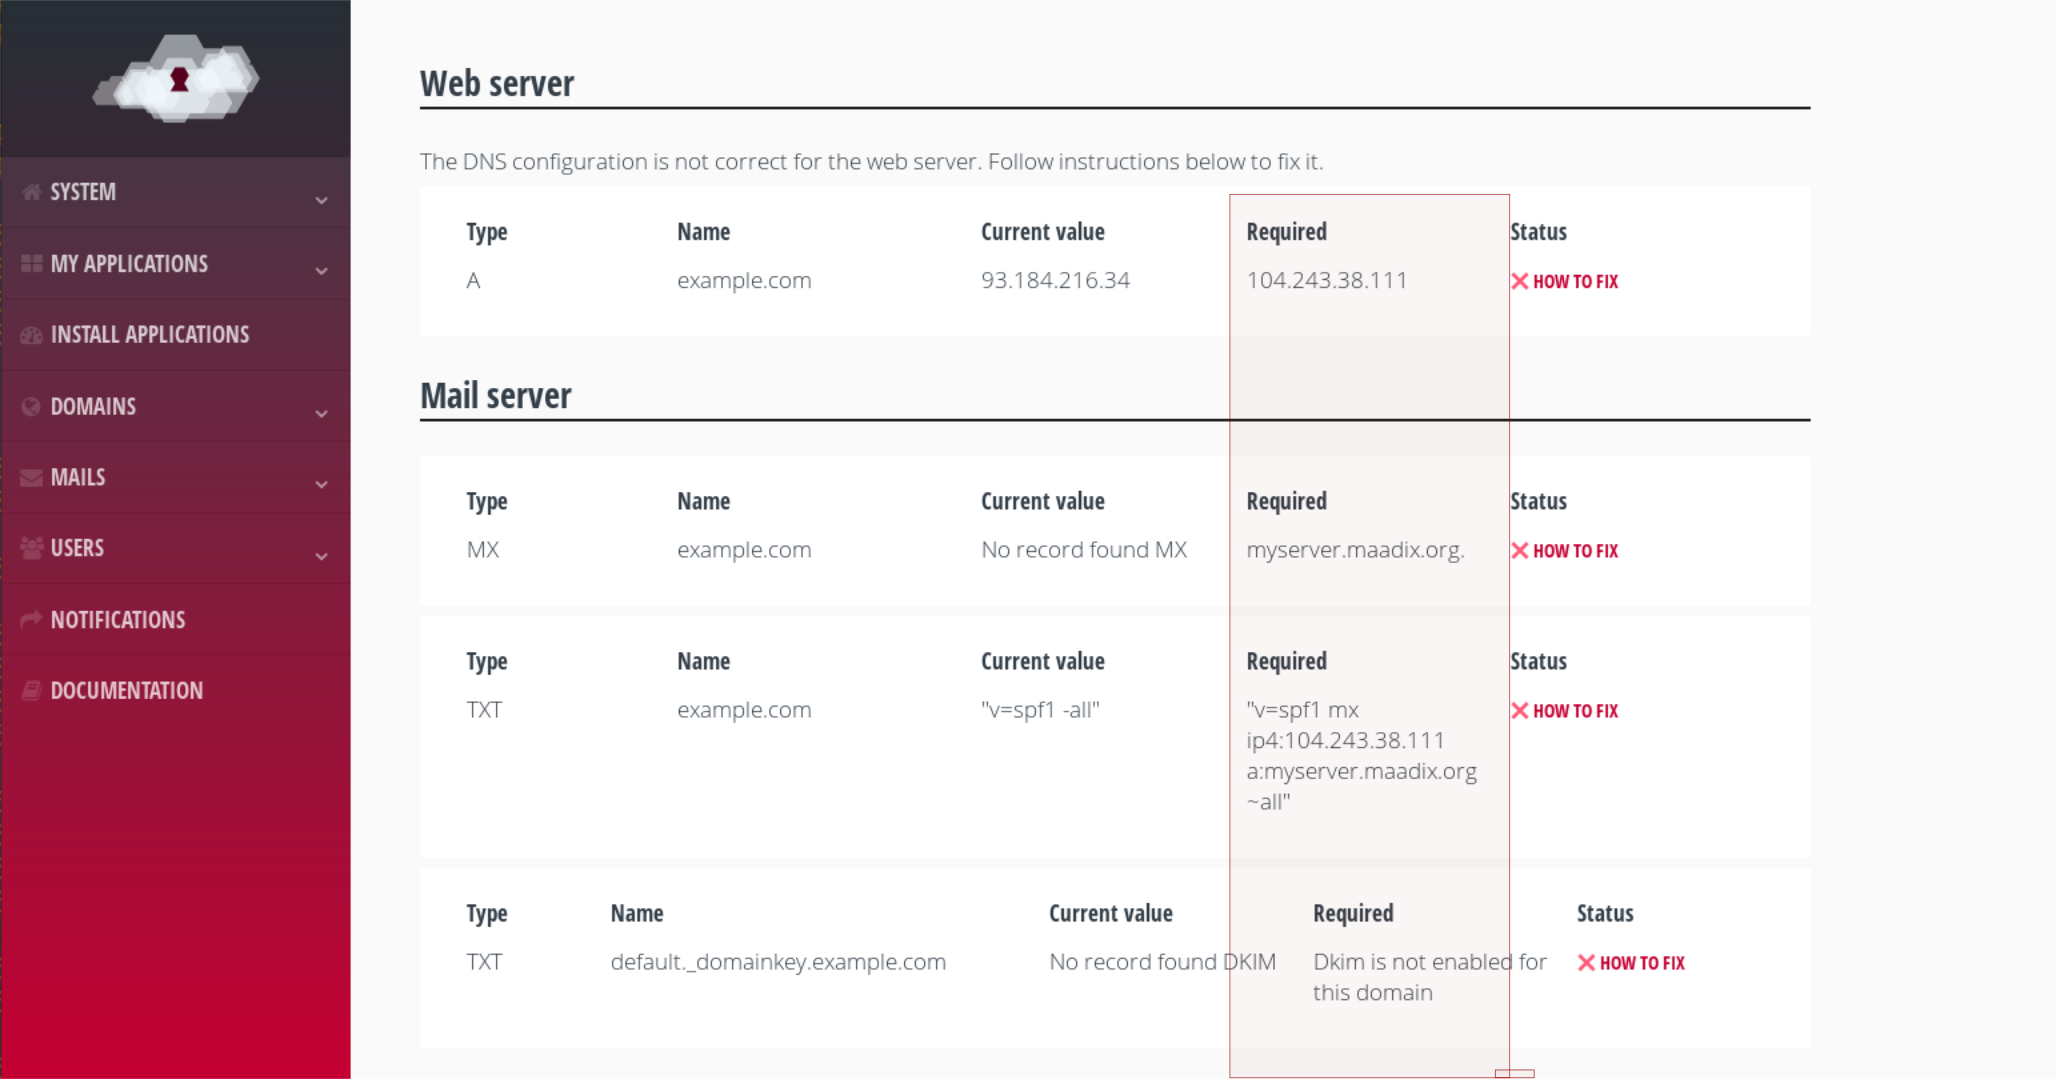
Required DNS records.
To create a subdomain or configure the DNS of an existing domain, you will have to enter the administration panel supplied by your provider (Gandi, Dinahosting, etc…). Unfortunately, each interface is different depending on the provider, so there is no unique way to carry out this process. See the DNS section of this user guide for more information.
Creating mailing lists or newsletters
Once a domain is added to the Mailman application, you can create one or more mailing lists or newsletters under the same domain. To do this, visit the ‘Lists’ tab in the menu above and then click on ‘Add new List’.
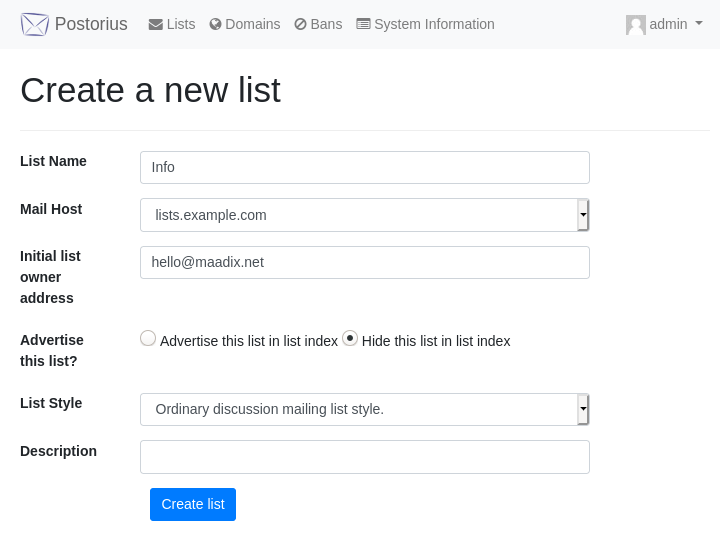
Creating mailing lists.
You will have to fill in the following fields:
List Name: the name of the list. In the example, we will create the ‘info’ list.
Mail Host: the domain for the lists. In the drop-down menu we choose the newly created subdomain lists.example.com.
Initial list owner address: we assign an email account as owner / administrator of the list.
Advertise this list?: this option sets whether the list will be publicly visible in the list of created lists or not. To make it visible, we will choose ‘Advertise this list in list index’, while if we choose ‘Hide this list in list index’ only the administrator will see it.
List Style: the type of list you want to create. The three options you can choose here are: ‘Announce only mailing list style’; ‘Ordinary discussion mailing list style’; or ‘Discussion mailing list style with private archives’.
Description: an informative description of the list (optional).
Once this phase is completed, we will have created the list. Next, we’ll need to set our configuration preferences.
Setting up list file parameters
You can choose whether messages sent to subscribers are kept and stored and, if so, whether they will be visible to anyone through a public link or only accessible to authorized persons.
At Settings > Archiving > Archive policy:”
Public archives: Anyone can consult them through the web interface of your application installation.
Private archives: the history is saved, but only the administrators can access it.
Do not archive this list: the history of sent messages is not saved.
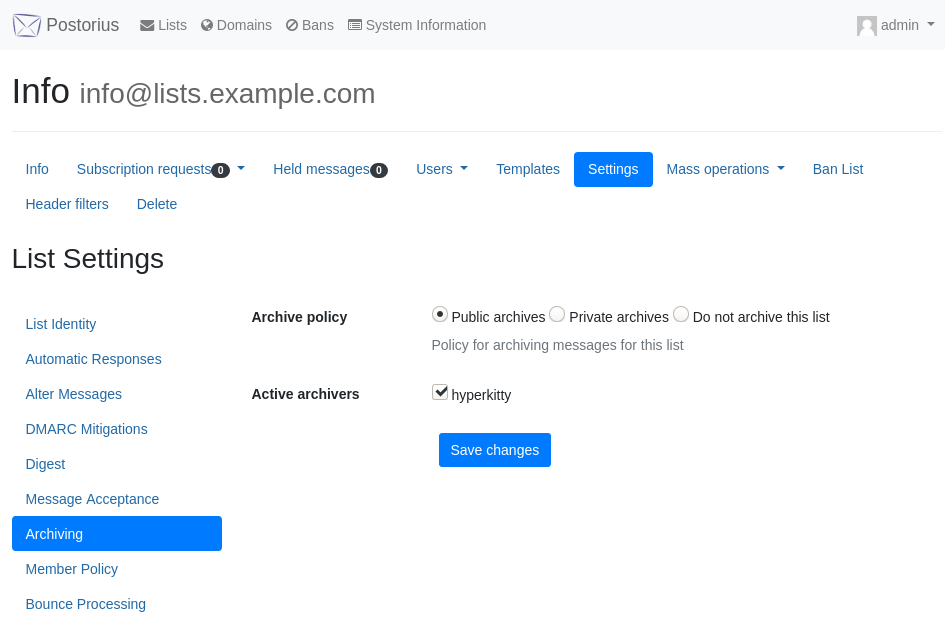
Message archiving policy.
The archive of the lists can be consulted at https://myserver.maadix.org/hyperkitty or at https://myserver.example.com/hyperkitty (if you have configured your own domain for the server).
Notification of subscription changes
Under Settings > Automatic Responses > Notify admin of membership changes, check the box if you want the administrator to be notified of membership additions and deletions.
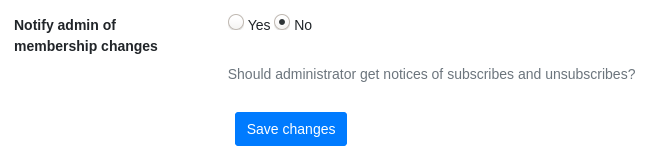
Notification options.
Adding Templates
In ‘Templates’ you can add templates for different messages that Mailman brings by default.
For example, if you want to change the welcome message to the list, you can add a new template by clicking on “New Template”and selecting from the drop-down “[list:user:notice:welcome]”. In the Data field you can add the welcome message that you want.
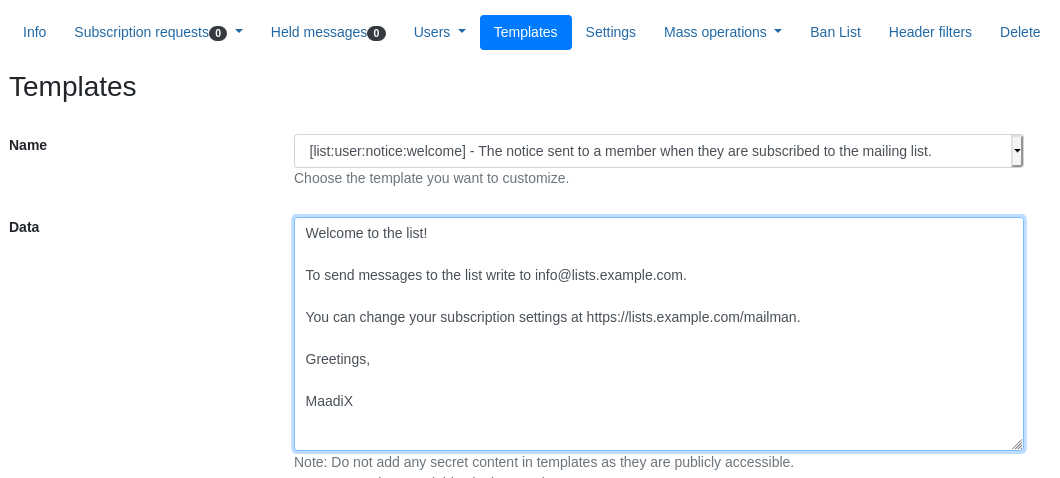
Welcome template.
If you want to change the message at the bottom (footer) that is added to each mail sent to the list, you can select from the drop-down “[list:member:regular:footer]” and in the field Data add the text you want.
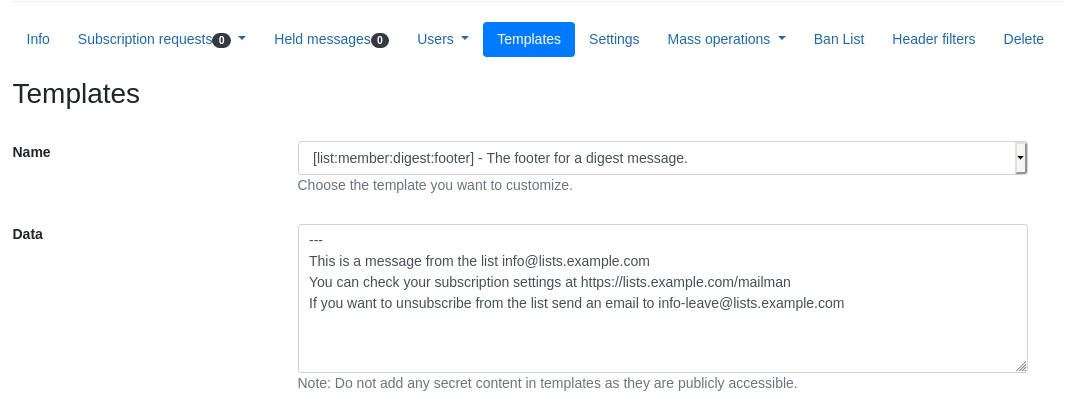
Footer template.
Once the list is created, you must follow a specific configuration process to turn it into a newsletter or a mailing list.
Setting up a newsletter
Remember that the newsletter is characterized by its unidirectionality: only expressly authorized accounts can send messages (as opposed to mailing lists, in which everyone can participate).
Setting up subscription and un-subscription parameters
In ‘Settings’ > ‘Member Policy’, choose one of the following options from the drop-down menu for ‘Subscription Policy’:
Open: anyone can be added to the newsletter without confirmation.
Confirm: subscriptions must be confirmed from a valid email when applying for registration.
Moderate: a moderator has to manually authorize each registration.
Confirm then Moderate: send first a confirmation email to the user and a moderator needs to authorize the registration.
We recommend the ‘Confirm’ option so that no email addresses can be added without consent.
You can also choose the same options for the ‘Un-Subscription Policy’, which will be applied when people want to unsubscribe from the newsletter.
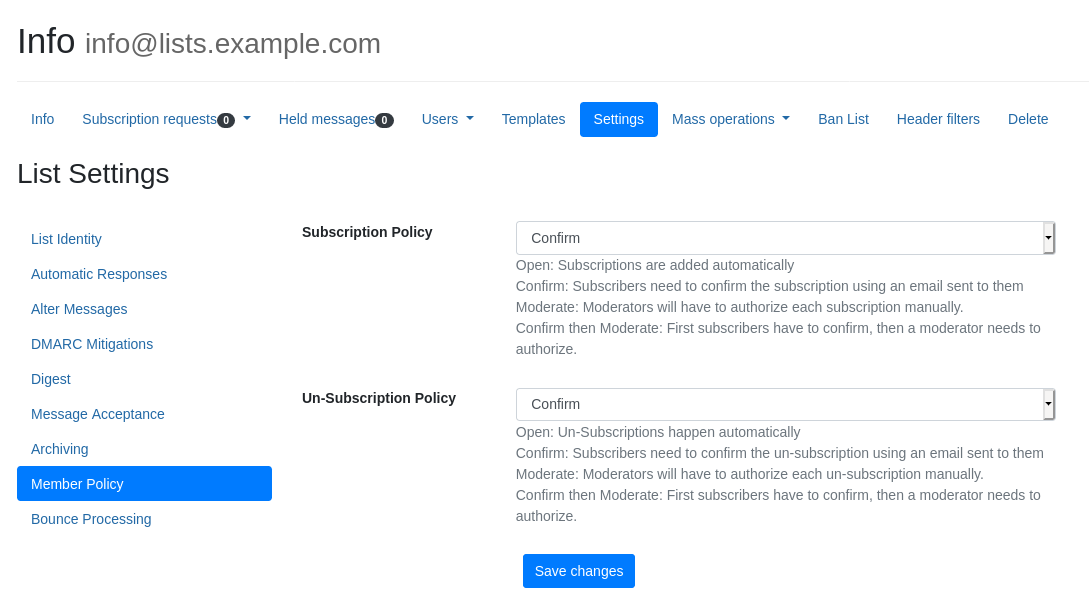
Subscription policy options.
Setting up parameters for incoming messages
Determines how messages addressed to the list by member and non-member users are treated. Since this is a newsletter, any incoming message whose sender is not authorized will be denied delivery.
In Settings > Message Acceptance, define the following parameters:
Default action to take when a member posts to the list: Discard (all messages from subscribed users will be discarded).
Default action to take when a non-member posts to the list: Discard (all messages from unsubscribed users will be discarded).
Default action to take when a non-member posts to the list: Discard (all messages from unsubscribed users will be discarded).

Incoming message settings.
Setting up newsletter delivery
At this time, no person is authorized to send mail, so it is necessary to grant this permission to at least one mail account, in order to make the mailings.
Under ‘Users’ > ‘Members’ you will find the list of subscribers. Choose the email account you want to use to send the newsletters, and click on ‘Member Options’. If the account is not present in the list, you will have to add it first (Mass operations > Mass subscribe).
At the bottom of the page select ‘Accept immediately’ as the moderation parameter, so that the selected account can send the newsletters. Remember that you can authorize more than one account for the same list.
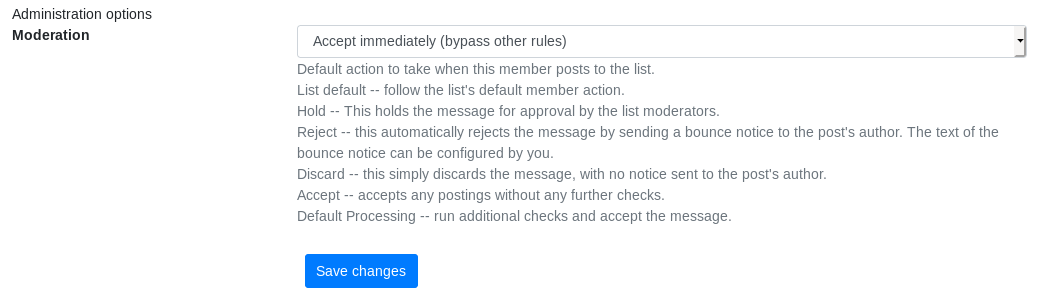
Moderation options.
Setting up a mailing list
Once the list is created, you must follow a specific configuration process to convert it into a mailing list. Remember that the mailing list is characterized by offering all users the possibility to participate (it is not unidirectional like the newsletter).
Setting up subscription and un-subscription parameters
In ‘Settings’ > ‘Member Policy’, choose one of the following options from the drop-down menu:
Open: Anyone can be added to the list without confirmation.
Confirm: subscriptions must be confirmed from a valid email when applying for registration.
Moderate: a moderator has to manually authorize each registration.
Confirm then Moderate: send first a confirmation email to the user, then a moderator will authorize the registration.
We recommend the ‘Confirm’ option so that no email addresses can be added without consent.
You can also choose the same options for the ‘Un-Subscription Policy’, which will be applied when people want to unsubscribe from the list.
Subscription policy options.
Setting up parameters for incoming messages
For mailing lists, where people can have conversations with each other, you can determine how messages addressed to the list are treated by both subscribed and unsubscribed people.
In ‘Settings’ > ‘Message Acceptance’:
For subscribed users, choose between one of these two options under ‘Default action to take when a member posts to the list’
Hold for moderation: a moderator has to authorize any message to be delivered to the rest of the subscribers.
Accept immediately: messages from subscribers will be automatically delivered to all other subscribers, without the need for moderation. This is the standard option for mailing lists.
For unsubscribed users, choose the option you prefer under ‘Default action to take when a non-member posts to the list’:
Hold for moderation: a moderator has to give permission for the message to be delivered to the list subscribers. This is the standard option for mailing lists.
Reject: all messages will be automatically rejected, notifying the sender.
Discard: all messages will be automatically rejected, without notifying the sender.
Accept immediately: all messages will be automatically accepted, without the need for moderation.
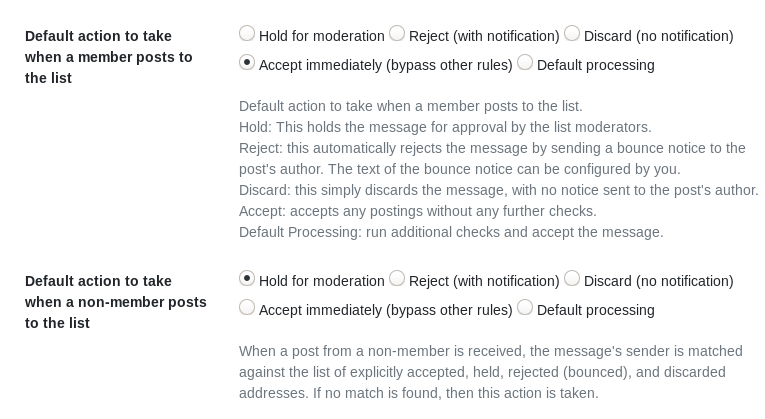
Message moderation options.