Mailtrain
Mailtrain is an open source application that allows you to create email campaigns without having to use third party services, thus preserving the privacy of our community. It offers a very easy and intuitive interface for creating new lists, configuring subscription and sending parameters, as well as many other useful options. All the instructions for use, with images, are included in the same tool. In this tutorial, we just give indications for the general configuration of the tool, so you can connect to the mail server and send the messages to the lists.
Installation
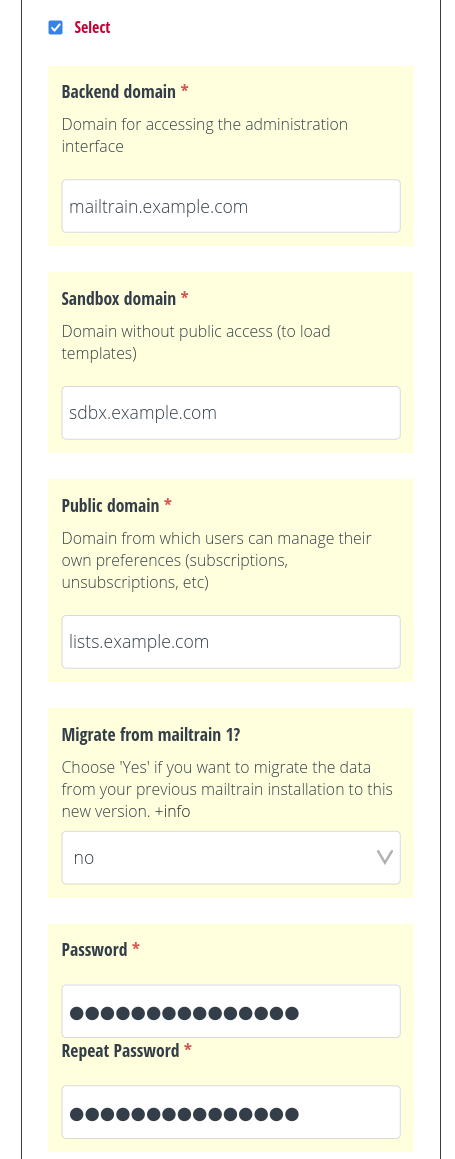
From the Control Panel, go to the ‘Install Applications’ section, there you will see all the applications available to install, including Mailtrain 2. Just check the ‘Select’ box and fill the input fields. Mailtrain2 requires three domains/subdomains for installation. All of them will require a valid DNS A or CNAME entry, pointing to the IP of your server. To do this you will have to add a record in the DNS zone editor of your domain provider ( operation external to MaadiX). See the DNS section for more information. Remember that the domains you use to install applications do not have to be added in the ‘Domains’ section.
Backend domain This will be the domain you will use to access the administration interface to create campaigns, templates, manage mailings etc.
Sandbox Domain This domain is in the background and you will never directly access it. The application needs it to load the newsletter templates.
Public Domain This domain is used to build the public links that are included in the messages you send such as the unsubscribe or subscribe buttons.
Import data from mailtrain 1 This field only appears if you have Mailtrain installed and allows you to import data to this new installation. See the section Imported Data for more details. Both versions will be kept simultaneously and will appear as both Mailtrain and Mailtrain 2.
A password to set for the Mailtrain administration account. Keep it somewhere safe as it will not be mailed for security reasons.
Once you have specified these two parameters you can click on the ‘Install’ button.
Mailtrain installation.
After a few minutes you will receive an email (to the address you have configured for the Control Panel administration account) confirming that the installation was successfully completed. If you have chosen the option to import data from your previous installation, the process is quite a bit longer.
General setup
Once the installation is completed you can access the administration interface using the Backend domain, in our example mailtrain.example.com. The link is available from the side menu of the control panel under My Applications -> Mailtrain2 -> Go To the App. If you have chosen the option to import the data check also the Imported data section.
As a first step, from the ‘Administration’ -> ‘Global Settings’ page fill in the general settings data according to your preferences.
Mailing Configurations
Mailtrain offers two options for sending newsletters: - ZONEMTA - SMTP
Each has its advantages and disadvantages. You can setup which one to use by going to the ‘Administration’ tab -> ‘Send configurations’ from the top menu.
ZONEMTA
This is the option enabled by default unless you have imported the data from your previous installation.
Advantages: With this option you will have the bounce control enabled i.e., you will be able to consult which mails could not be delivered.
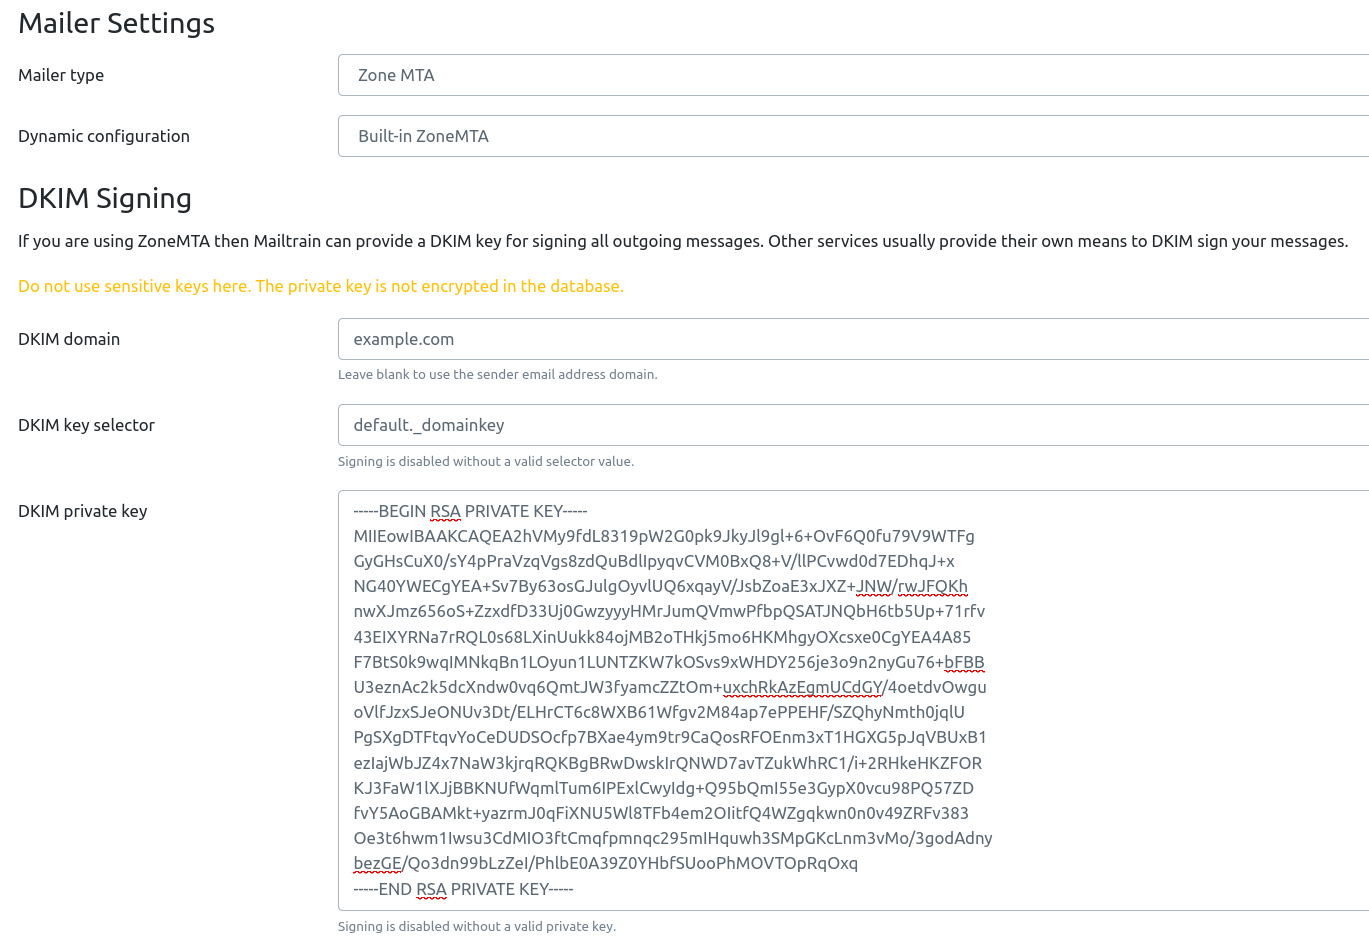
Disadvantages: To minimize the risk of your emails being rejected or ending up in the spam folder, you will have to manually add the private DKIM key of the domain corresponding to the ‘From’ account. If the ‘From’ account you will use to send the newsletters is an account created on your MaadiX server, let’s say info@example.com, you can access this key, but only from the console as Superuser. You will see in the same interface a yellow warning: Do not use sensitive keys here. The private key is not encrypted in the database. The problem is that any private key is sensitive data, but if you want to use this method you have no other choice.
To copy it you will need to do the following:
Access the server with SSH(No SFTP) with thw command
ssh mysuperusername@myserver.maadix.orgCopy the Dkim key
sudo cat /etc/opendkim/keys/example.com/default.private
Te pedirá la contraseña de la cuenta mysuperusername. Una vez insertada, te aparecerá la clave DKIM en la consola.
Copy all the text including the lines containing BEGIN and END PRIVATE KEY and insert it into the DKIM private key field.
In the DKIM domain field you have to insert example.com and in DKIM key selectordefault._domainkey .
SMPT
Advantages: It is not necessary to copy the DKIM key, which will be automatically used for sending, as long as it is enabled for the ‘From’ account domain.
Disadvantages
You won’t have bounce control from the interface. However, you could still keep track of which recipients have rejected the message by accessing the ‘From’ account with an email client (Thunderbird, Rainloop, etc).
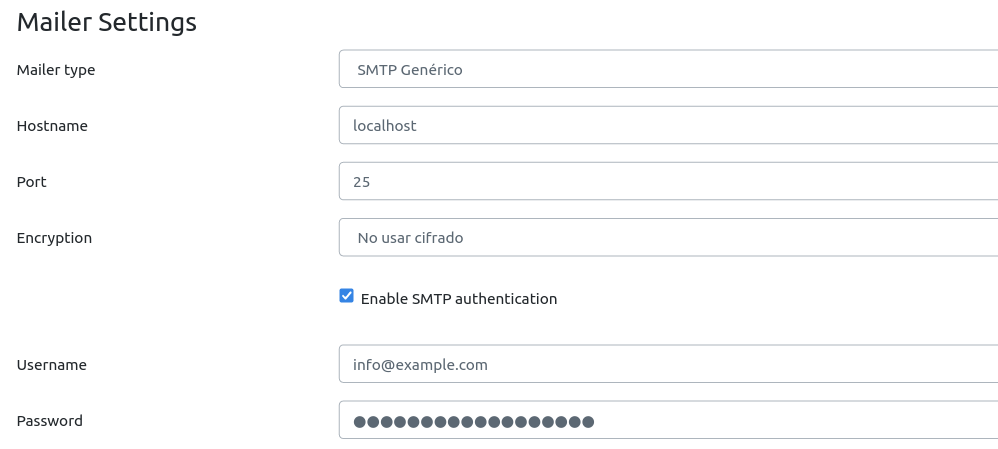
To configure the delivery by SMPT you will have to choose the Generic SMPT with authentication option, filling in the Hostname, Port fields and adding user and password. The necessary values will depend on the mail provider of the sending account. In the following image we put an example of SMPT configuration with authentication for the account info@example.com created on a MaadiX server named myserver.maadix.org.
Imported data
Since MaadiX release 202302 the available version of Mailtrain is version 2. We have developed a mechanism for importing data from version 1 to version 2. However, due to the large difference in structure between the two versions, it is not foolproof, depending on your previous configuration. At the time of installing Mailtrain2 you can test the automated import by activating the checkbox ‘Import data from Mailtrain 1’.
In this case you will have both applications installed simultaneously. You can verify that all the data has been imported correctly and make the manual adjustments required. In the new interface you will find the campaigns and lists previously created as well as the general sending settings. However, it is necessary to manually review some sections as detailed below.
Sending
In the Administration -> Send configuration section you will find as default values those of your previous configuration. However it is necessary that you do a test sending because, depending on your previous preferences, Mailtrain2 may not be able to send the emails.
In the following image you can see an example of SMTP configuration without authentication.
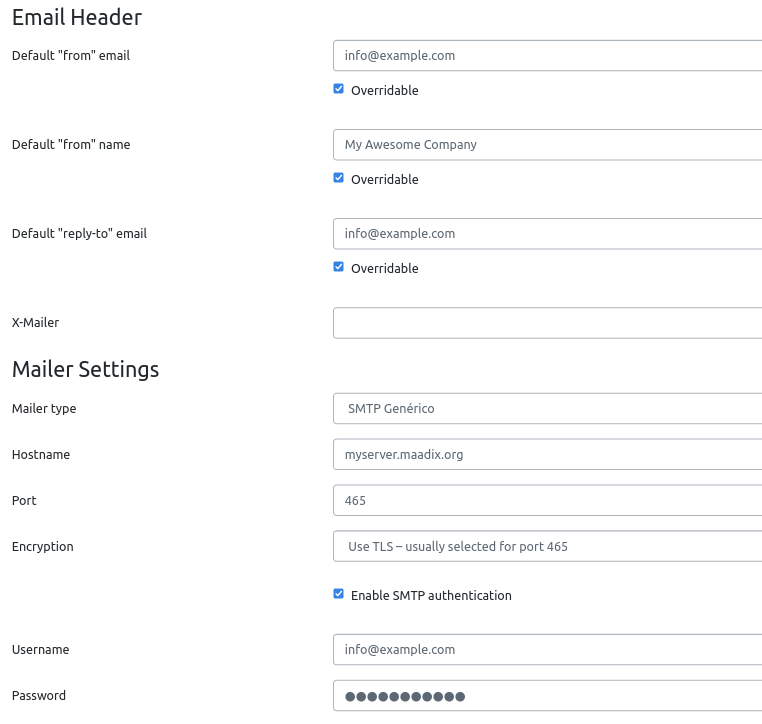
This type of configuration does not work in Mailtrain2 so, to continue using SMPT, you will have to set it to use SMTP with authentication , adding the fields Hostname, Port, usuer and password. The required values will depend on the mail provider for the sending account. In the following image you can see an example configuration for sending by SMPT with authentication for the account info@example.com created in a MaadiX server myserver.maadix.org.
Templates
Some imported templates may not work correctly. Before reusing them, access their edition page and click Save (even if you do not change anything). We recommend you to launch a test mailing Before you use them
Domains and links
If you wish, you can reuse your old domain for the new Mailtrain2 installation. To do this you will need to delete the previous instance as it is not possible to have two active applications under the same domain. If you decide to proceed, please note the following:
Once the previous installation has been deleted you will no longer be able to recover it. Another option you have, instead of removing it, is to change the domain of the old installation and use it in the new one. This domain would correspond to the Public domain in Mailtrain2.
The internal links included in your previously sent newsletters (unsubscribe, subscribe, etc) will not work in the new installation even if you are using the same domain as the tructure of the application has changed substantially.