WordPress
To install Wordpress you can opt for the automated installation or if you prefer to do a manual installation. In case you want to import an already created wordpress you will have to opt for the second method.
In this document you will find indications for both methods
Automated Installation
To be able to install Wordpress with this method, you need to have a domain/subdomain and you must have previously created a DNS entry of type A for the domain to point your server’s IP. You can check this section for instructions: Create DNS record of type A.
Una vez tengas los registros DNS creados correctamente puedes acceder al panel de control en la sección Dominio > Aádir Dominio Nuevo o bien editando un dominio ya previamente creado. En el caso de edición de un dominio ya añadido previamente es necesario que su carpeta no contenga ya otra web o algún archivo. Si se diera este caso la instalación se abortaría para evitar posible perdida de datos.
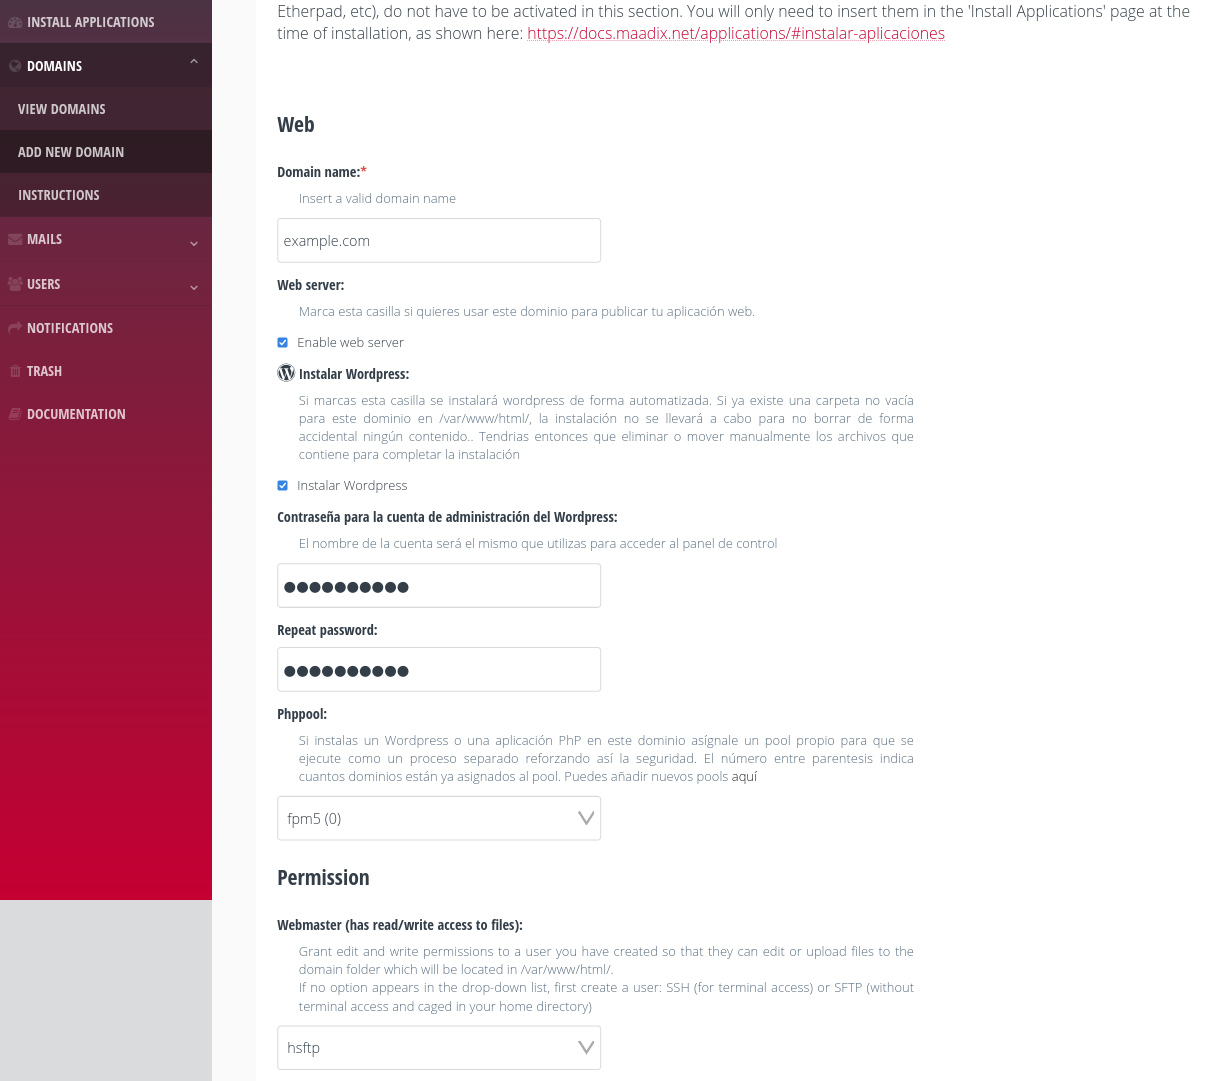
Verás un formulario como el que se muestra en la siguiente imagen.
Download WordPress from the official website.
The required values shall be:
The domain name
Activate the Web Server
Install Wordpress
Insertar dos veces la contraseña
Choose a Pool from the PhpPool dropdown. This will strengthen the security and performance of the website which will be assigned its own process, isolated from the rest of the applications. It is advisable to assign a unique application to each Pool (the number in brackets indicates how many domains are already assigned to the pool). If you need to add new pools you can do it from the ‘System’ -> ‘Php-FPM Pools’ page. You can refer to this page for more information on how this works: Php-fmp Pools.
Clicking on the ‘Assign Webmaster’ drop-down will list all ordinary accounts that can be assigned as webmaster (those that you have created with SFTP or SSH access). The webmaster account will have read/write permissions on the Wordpress files.
Security
In addition to the option to run the Wordpress process in its own pool we have included other default configurations that aim to enhance security and improve performance. Among them:
Prevent php execution in wp-content/uploads
Prevent editing of files from admin interface.
Enabled fail2ban for xml-rpc: the xmlrpc.php file is used by the Wordpress mobile application or a plugin such as Jetpack for remote or scheduled publishing of content. However, this file is increasingly used in different attacks including brute force access attempts. In addition to the risk involved, these attacks are often the cause of slow website performance. With fail2ban, Ips that have made repeated requests (more than two in an hour) will be blocked, so that they can no longer try to gain access and do not use system resources.
Desactivar pingbacks y comentarios e general: muchas veces se dejan estas opciones activadas aunque no se utilicen. Si las necesitas las puedes activar desde la interfaz de admin. Esta opción se puede cambiar desde el panel de configuración del wordpress
The installation process takes a couple of minutes. Once it is finished you will receive a confirmation email. If you don’t remember the password you chose during the installation you can use the Wordpress password recovery feature.
Manual Installation
Download the application from the official website and unzip the folder.
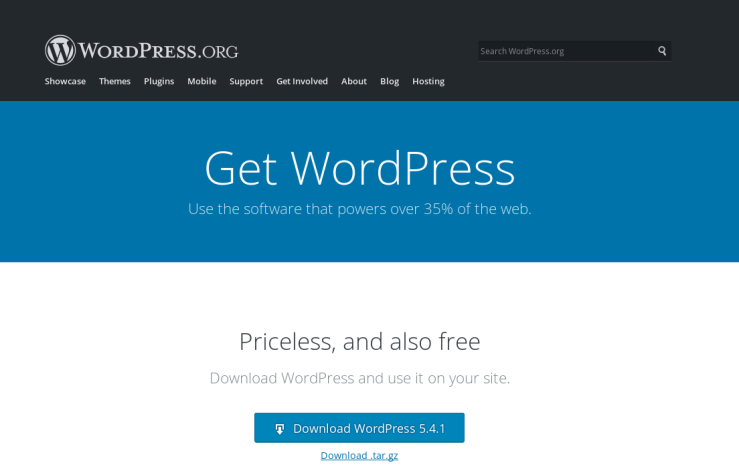
Download WordPress from the official website.
Upload to the server the files in the ‘wordpress’ folder, inside the domain folder that was generated when the domain was activated from the control panel. If you have added the domain example.com, the folder will be
/var/www/html/example.com/.
To do this, you can use an SFTP client such as Filezilla. Remember here how to upload content to the /var/www/html/example.com/ directory. Warning: You should not upload the “wordpress” folder as such, only the files within it.
Create the database.
To create a database, you can use the phpMyAdmin application. Remember how to use phpMyAdmin here.
Importing an existing database
In case you already have a MySQL database of your WordPress (for example, in cases of migration from another server), it is necessary to import it. From phpMyAdmin, you have to select the ‘Import’ section and upload the corresponding file (.sql or .gzip, .bzip2 or .zip if it is compressed).
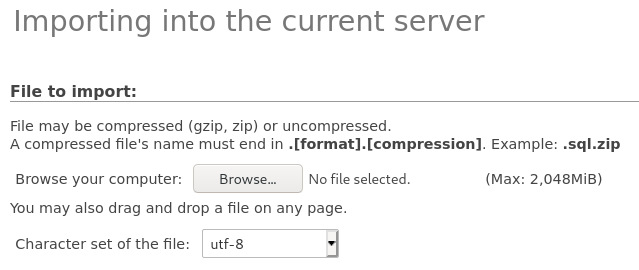
Importing database in phpMyAdmin.
Once imported, we have to select the ‘Privileges’ section to create a new account that can access the database, read and write to it (it is not advisable to use the same root or admin account for security reasons).
Choose a name and a password and click on “Grant all privileges for the ‘MyDatabase’ database”. Write down the account name and password you just created, since they will be needed during the WordPress installation process.
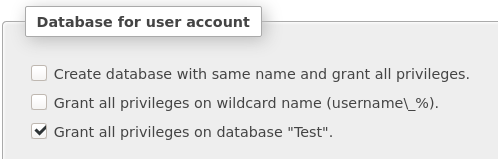
Granting database privileges in phpMyAdmin.
Create a new database
If it is a new installation and we don’t have a MySQL database created yet, it is necessary to create one. Inside phpMyAdmin, we have to go to ‘Databases’ > ‘Create database’.
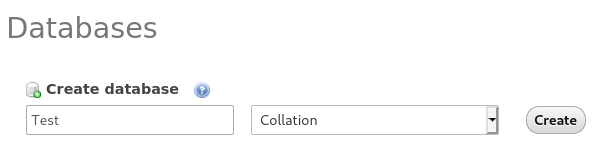
Creating a database in phpMyAdmin.
Once created, we have to select the ‘Privileges’ section to create a new account that can access the database, read and write to it (it is not advisable to use the same root or admin account for security reasons).
Choose a name and a password and click on “Grant all privileges for the ‘MyDatabase’ database”. Write down the account name and password you just created, since they will be needed during the WordPress installation process.
Granting database privileges in phpMyAdmin.
Setting up WordPress
When we have created the database and the files in the WordPress folder are already in /var/www/html/example.com/, we have to visit the domain with the browser. A form will appear to finish the installation process of WordPress, in which the credentials of the MySQL account we have created will be requested.
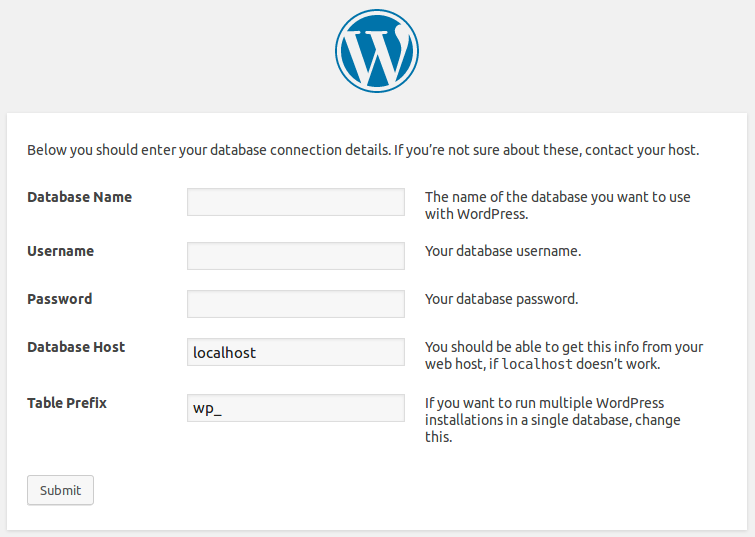
WordPress installation wizard.
Remember that changing the wp_ prefix to another in the ‘Table Prefix’ section adds an additional security layer to your installation.
Common problems with WordPress installation
Make sure that the permissions of the files you have uploaded via SFTP are correct. The folder /var/www/html/example.com/wp-content must have the following permissions to allow WordPress to upload images and plugins from the admin panel.
drwxrws--- that is, 770
o check that the permissions are correct, from FileZilla you must right-click on the wp-content folder and select the option ‘File permissions’ or ‘File attributes’, depending on your version.
The permissions have to be this way, being the numerical value 770. This means that both the Webmaster and Apache account will be able to write in the folder. If the permissions you have are different, you can proceed to modify them from the same Filezilla, assigning two different permissions for folders and for files. For the folders you need the execution permission. You will then set permission 770 and check the option ‘Apply only to directories’.
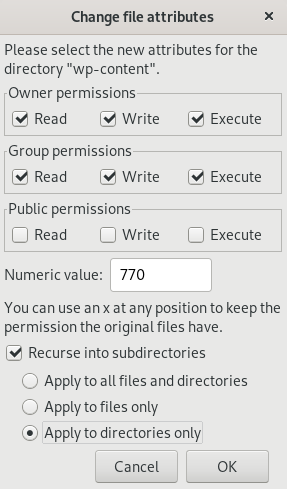
Editing directory permissions.
Repeat the operation for the files, which do not need execution permission. You can assign 660 permissions and select the option ‘Apply only to files’.
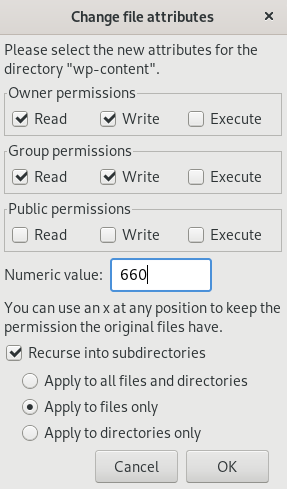
Editing file permissions.
If you want to enable the option to update the whole wordpress from the administration web panel (wp-admin) you will have to follow the same steps but applying these changes not only to the wp-content folder, but to all the wordpress folders, that is /var/www/html/example.com/
–
Even if the permissions of the WordPress folders are correct, you may have problems installing plugins or uploading images. To fix this, add the following line to the end of the wp-config.php file
define( 'FS_METHOD', 'direct' );
When you upload images or plugins from WordPress, instead of from a SFTP client, the operation is not performed by your own account, but by Apache (www-data). Although this account has write permissions on the files, it does not own them. On shared servers, this could represent a security problem, since the same www-data account could be used by all people who have access. Therefore, WordPress uses a method in which it checks (in addition to permissions) whether the owner of the files matches the account that is performing the write operation. This situation does not occur, so it does not continue with the operation and asks for your FTP credentials.
In MaadiX you do not have FTP or FTPs, only SFTP , which uses port 22 instead of 21, which is the one that uses WordPress without giving you the option to change it. The solution of defining the method as ‘direct’ makes WordPress directly access the file system, where the www-data account has the necessary permissions to write.
If you want to know more, you can check these two links: