Host your website
Here is a summary of the steps to follow if you want to host a web page or web application on a MaadiX server:
On the MaadiX Control Panel, create a regular account with SFTP or SSH access to be the webmaster of the site.
On the MaadiX Control Panel, add the domain or sub-domain and assign the previously created account as webmaster.
Connect to the server with the webmaster account to upload the web files to the
/var/www/html/ejemplo.comdirectory.In your domain provider’s DNS zone editor, add an A record that points the domain or sub-domain to the server’s IP (external operation to MaadiX).
Wait until the server detects that the DNS is pointing to the server (this may take a few minutes)
On the MaadiX Control Panel, activate the web server for the domain: “Edit domain” > “Activate web server” (it takes a few seconds to activate).
Below you can find a more detailed explanation of each step. The order of the steps can be changed according to your needs.
Remember that you can host as many websites as you want, there is no limit to the number of domains, you just have to have enough space and resources on the server.
Your webmaster account
The first requirement to manage a web on a MaadiX server is an regular account with SSH or SFTP access that acts as a webmaster.
Remember that the Superuser account cannot be assigned as a webmaster.
This functionality is designed so that the person who develops and updates a website has their own account and limited permissions, only those necessary to upload the files that make up the website. They will not be able to make other modifications in the server.
This is useful for organizations where the person who manages the server is different from the person who develops the website.
To create a regular user account you have to go to the control panel, to the section ‘Users’> ‘Regular users’ and click on the button ‘Create new account’.
To be assigned as a webmaster a regular user must have access permissions by SFTP or SSH. You can choose this when creating the account in the section ‘SSH or SFTP access to the server’.
The same account can be assigned as webmaster for several domains.
In case your website or web application uses databases (such as Wordpress), it is probably useful to activate phpMyAdmin access to this account (you can see more details here).
Adding the domain to MaadiX
To add your domain or subdomain you will have to go to the Control Panel, to the section ‘Domains’ > ‘Add a new domain’
At this point you have to assign as webmaster the regular account created previously, select it from the drop-down menu. You can edit it later if you need to.
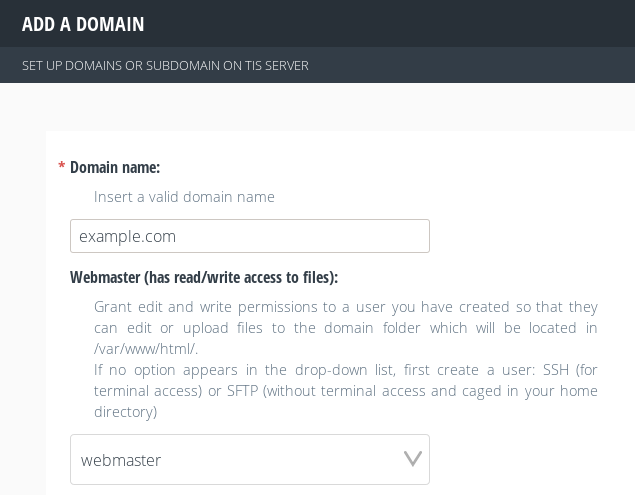
Set webmaster for the domain.
In this documentation you can find the details of how domains are managed in MaadiX.
When the domain is added the server checks if this domain is pointing to your IP, if it is correct, the web server will be activated and you will see in the Control Panel “Web server: Enabled”. If the domain is not yet pointing to the server, the web server will not be activated. You can enable it later by clicking on “Edit domain” > check the box “Activate web server” > “Save”.
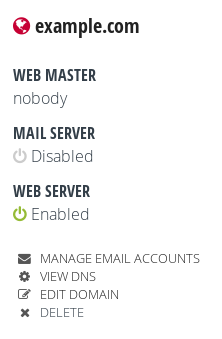
Details of the added domain.
In addition, when a domain is added to the Control Panel, the /var/www/html/example.com directory is created on the server, even if the web server is still disabled (that is, the Apache virtual host and Let’s Encrypt certificates have not yet been created). This is useful for planning migrations and uploading the files that compose the web before changing the DNS.
Note: in case you do not have your own domain name, you can use subdomain.maadix.org, where ‘subdomain’ coincides with the name you chose when you purchased your MaadiX server. In this case, you have to upload the web files to /var/www/html/subdomain.maadix.org with the Superuser account.
Upload content
Once you have added the domain, you will have to upload the files of your website or application to the directory /var/www/html/example.com.
You can access this location with your assigned webmaster account and upload the files using an SFTP client. In case you don’t have an SFTP client installed and you don’t know which one to choose, Filezilla is one of the most used and simple ones.
Remember that, for security reasons, FTP connections are not allowed on MaadiX servers, only SFTP.
With an SFTP account
This will be the case when you have assigned as webmaster an account that is only authorized by SFTP. SFTP accounts will only have access by SFTP and not by terminal (by SSH).
This account will be the owner of the /var/www/html/ejemplo.com folder, so only by connecting to this account you will be able to modify the files in it.
The login details for the connection using Filezilla (or another SFTP client), will be the following:
Server: sftp://subdomain.maadix.org
Protocol: SFTP (remember to specify).
User name: Webmaster name account.
Password: the password of the Webmaster account.
Port: by default will be port 22 (see more in the security section).
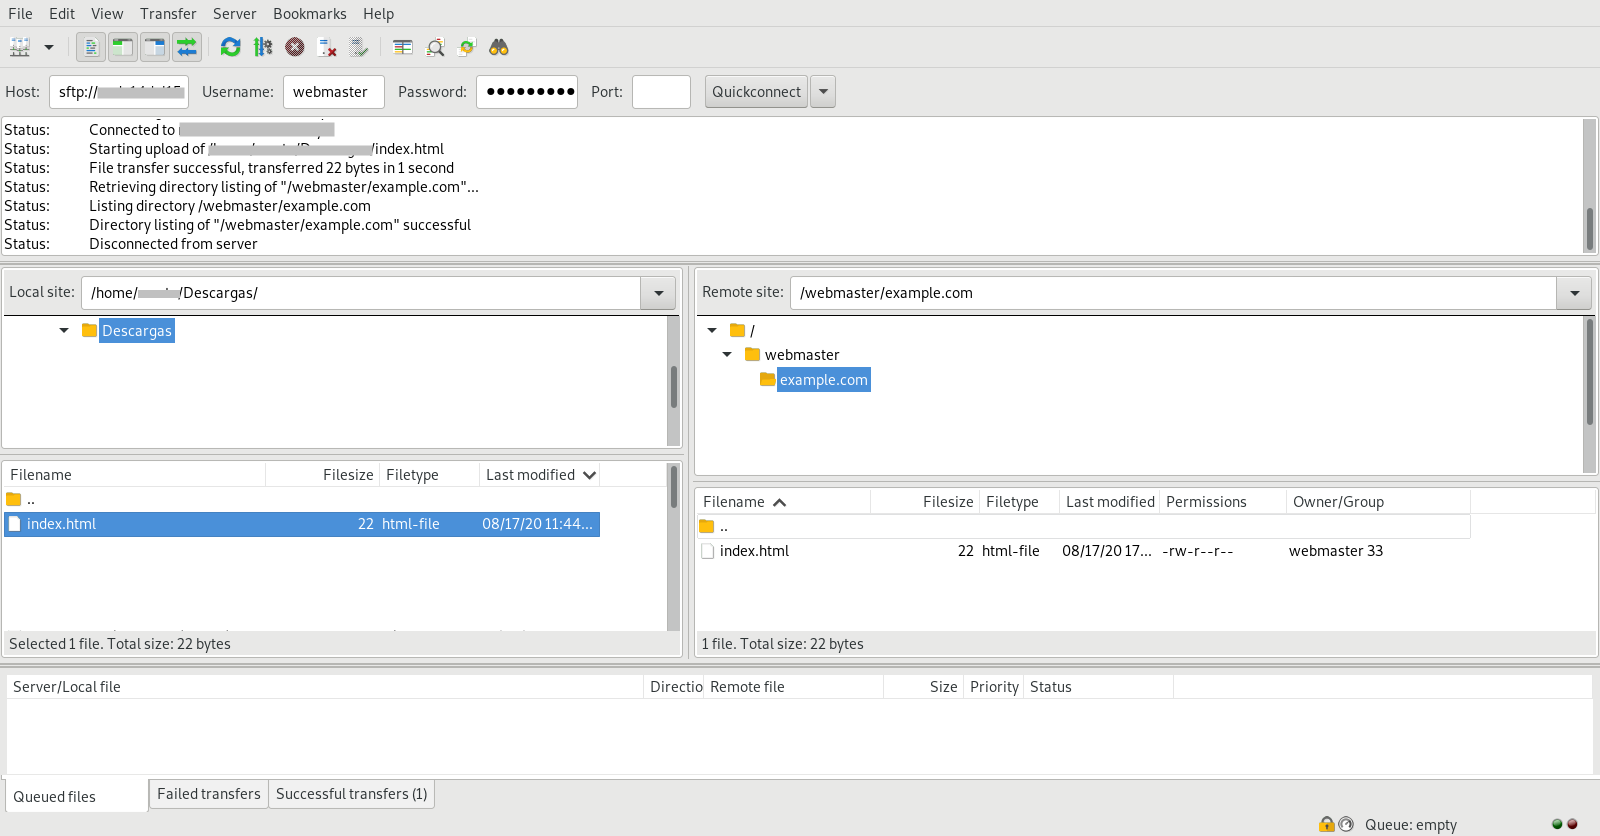
SFTP client (access with a SFTP account).
When the connection is established from an SFTP account you will see a folder with its name. Within this folder you will find a folder with the name of the domain or sub-domain (which is a symbolic link to /var/www/html/example.com). There may be several folders if this account is a Webmaster for other domains.
You can also have other files of your own that you have uploaded or created previously. Webmaster accounts only have access to this area and not to all system files (as the Superuser account does).
Within the folder with the domain name /Webmaster/example.com is where you will have to upload the files that make up the website or web application. It will be done easily by dragging the files from the local computer.
Note: if you make too many failed connection attempts (more than 6) with an SFTP client the server will block the IP of your connection (from your office or home). Find more information here.
With an SSH account
This will be the case when you have assigned as a webmaster an account that has access via SFTP and SSH. This account will be able to access the server both by terminal (via SSH) and by using an SFTP client.
The way to access via SFTP is similar to the one described in the previous section, but in this case the location where you land when the connection is established is different. These accounts have their own directory in /home/USERNAME and unlike SFTP accounts they are not caged in it. They can access other directories and perform read/write operations on files they own.
You will have to navigate through the folders until you reach /var/www/html/example.com/, which is where you will have to upload or create the files of your new website or application. Another faster option is to type the path /var/www/html/example.com/ in the ‘Remote Site’ field.
Once there, you can follow the same steps described for SFTP accounts.
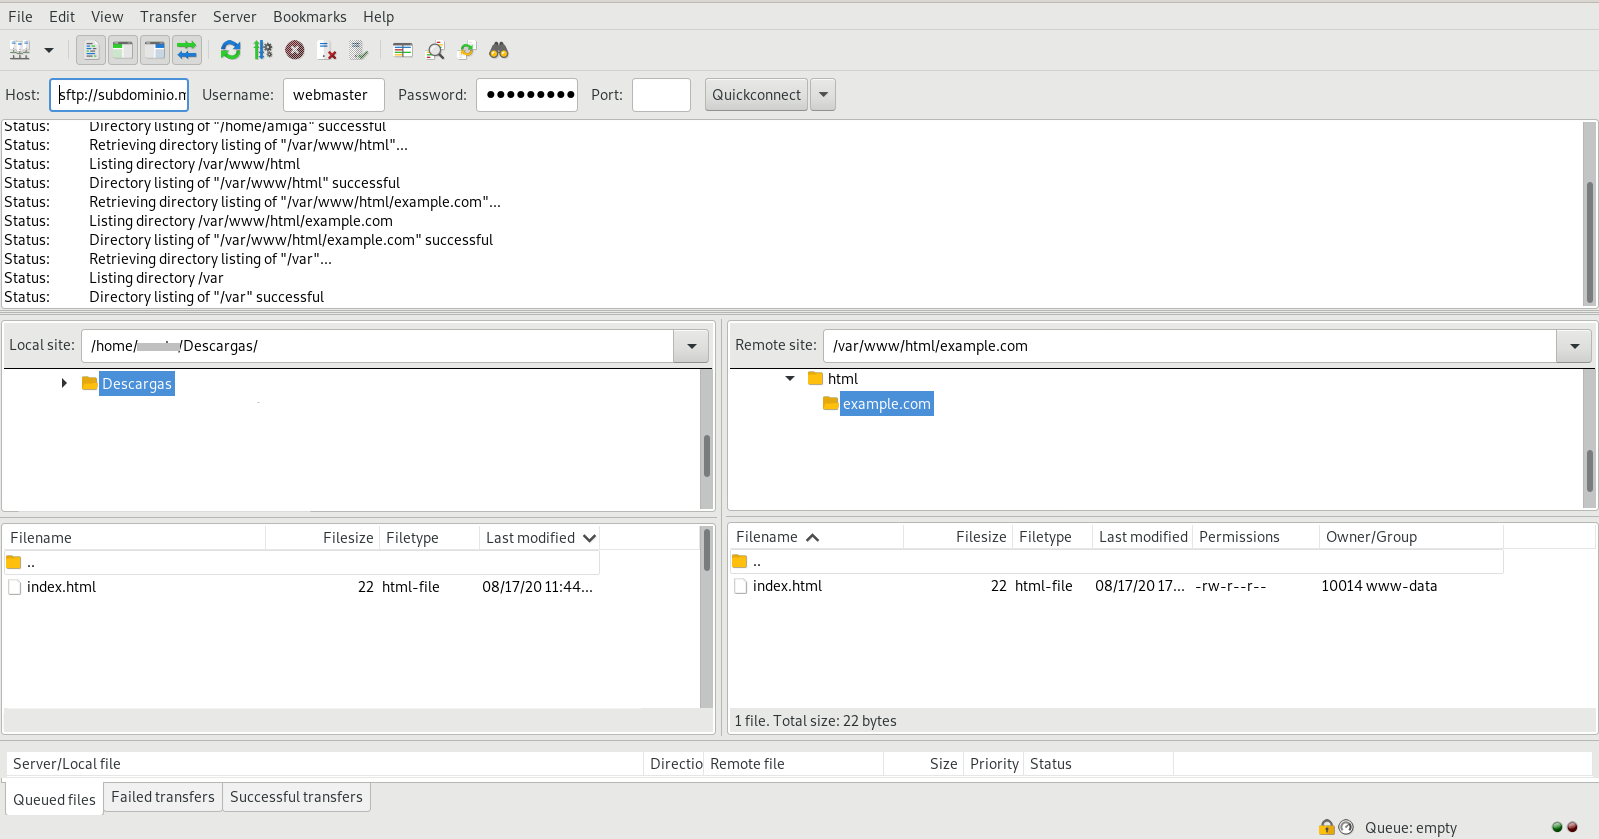
SFTP client (access with a SSH account).
Point the domain to the server
In order to create a website accessible from any browser you will need a domain or sub-domain that you will have to register with a provider (for example, gandi.net or Njal.la, on the Internet you can find many more).
Once you have your domain, you can go to their DNS zone editor and add an A record that points to the IP of your server (the IP of your server can be seen in the ‘Control Panel’ > ‘Domains’ > ‘Instructions’).
Remember that this is an external operation to MaadiX and that each provider and DNS zone editor is different. MaadiX is not a domain provider and does not offer a DNS zone editor.
Usually the provider you register your domain with offers you a DNS zone editor to which you can add records.
Examples:
Type |
Name |
Value |
|---|---|---|
A |
@ |
IP.OF.YOUR.SERVER |
A |
sub-domain |
IP.OF.YOUR.SERVER |
It may take a few minutes for the server to detect the new DNS configuration, to check that it recognizes that the domain is pointing to the server you have to go to the Control Panel, to the section “Domains” and in the domain that has been added click on “View DNS”.
You will have to see a green tick for register A as shown in the next screenshot:
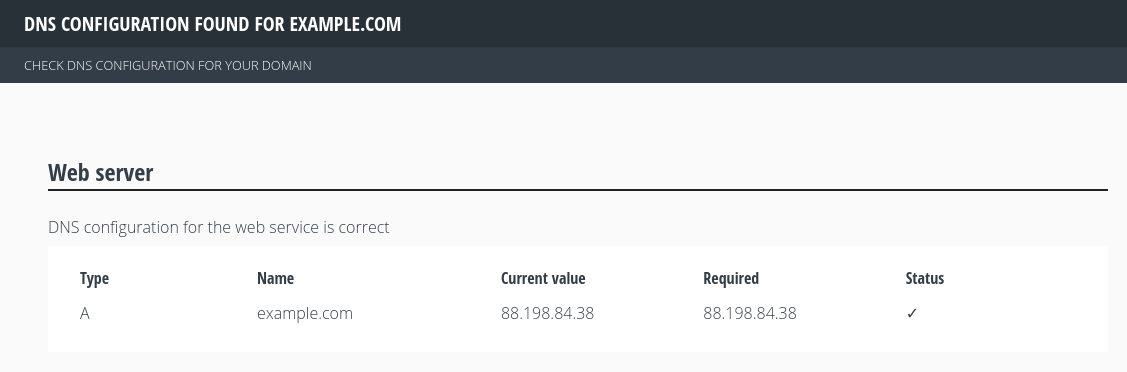
Correct DNS configuration.
Enable the web server
Once the DNS configuration is correct and the server detects that the domain is pointing to the server, the web server can be activated for this domain. To do this, you must edit the added domain, check the box “Activate Web Server” and hit “Save”.

Enabling the web server.
Remember that it takes a few seconds to be enabled. This is the time needed to create the Apache virtual host and the Let’s Encrypt certificates. After a few seconds you will see “Web Server: Enabled”.
Web server enabled.
Once the web server has been successfully enabled, the virtual host of the domain can be found in the /etc/apache2/ldap-enabled/ directory and the Let’s Encrypt certificates in /etc/letsencrypt/.
If the domain was already pointing to the server when it was added to the Control Panel, the web server will be enabled automatically.
Let’s Encrypt Certificates
When you activate the web server for a domain in the manner described above, a Let’s Encrypt certificate is automatically generated and configured for this domain.
You don’t have to do anything else to configure the certificates. Connections to your website or web application will be made via https.