Libre Office Online
LibreOffice Online is an application that enables the collaborative editing of documents in a browser and in real time, reusing the core of LibreOffice.
Provides an alternative to Google Docs, and allows you to edit rich text documents, spreadsheets and presentations. Accepts a wide range of formats (.odt, .doc, .docx, .ods, xls, .xlsx, .odp, .ppt, .pptx…)
To use it, you also need to have installed Nextcloud, which will be the interface that will allow you to access the editing options. With LibreOffice Online, the documents stored in Nextcloud will be opened in the browser for reading/editing, instead of just showing the download option.
System requirements
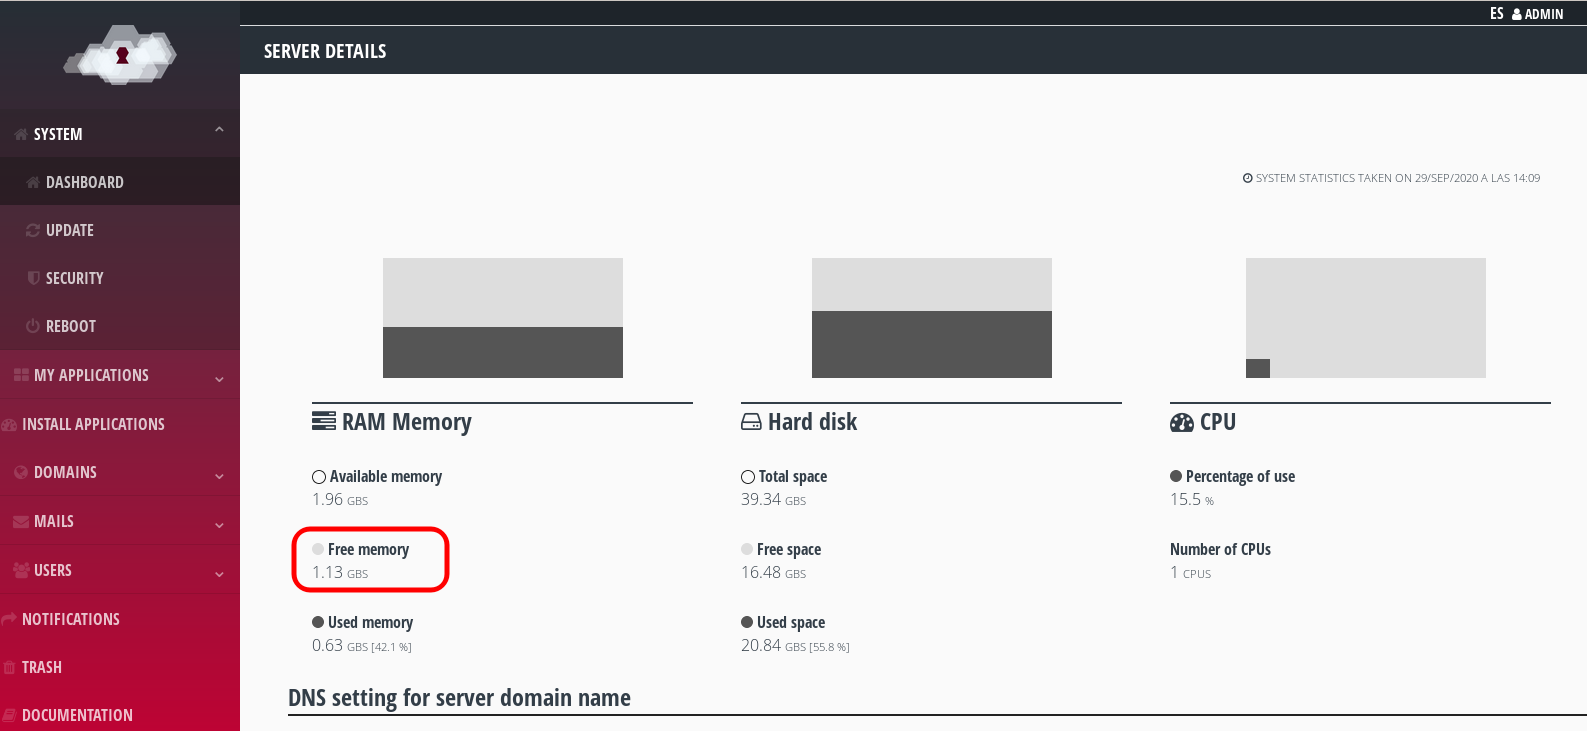
Before proceeding with the installation, it is advisable to check that the server has the necessary resources available to operate properly. These requirements will depend on the number of documents/users operating at the same time. Each time a document is opened for editing, it is loaded into memory. The amount of memory required will thus depend on how many documents you plan to be able to edit simultaneously. In any case, in general, and for a better experience, it is ideal to have at least 300 MB of free RAM.
You can check this information on the control panel, in System > Dashboard section.

System statistics.
Installation
Before proceeding with the installation it is necessary to decide under which domain or sub-domain the application is to be hosted. We will use as an example the subdomain libreoffice.example.com.
We will have to create a type A DNS record, which points to the server’s IP.
libreoffice.example.com A IP.OF.YOUR.SERVER
Depending on your domain provider, it may take a few minutes or a few hours for the DNS to propagate. Once the DNS are propagated you can proceed with the installation from the control panel.
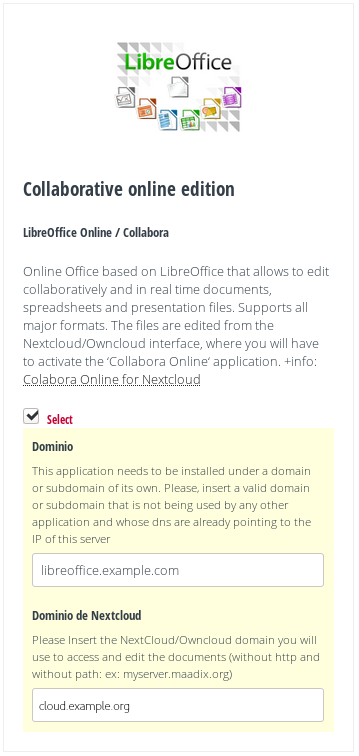
When you click on Collaborative online edition (LibreOffice Online / Collabora), from the ‘Install Applications’ page, two fields will be displayed, in which you will have to insert the following values:
1. The name of the domain/subdomain you want to use to install the application. In the case of our example it will be libreoffice.example.com
2. The domain of the Nextcloud installation that you want to connect to the LibreOffice Online, that is, the url that you use to access the Nextcloud with your browser, for example cloud.example.org.

Installation of Libre Office Online / Collabora.
Connecting Nextcloud
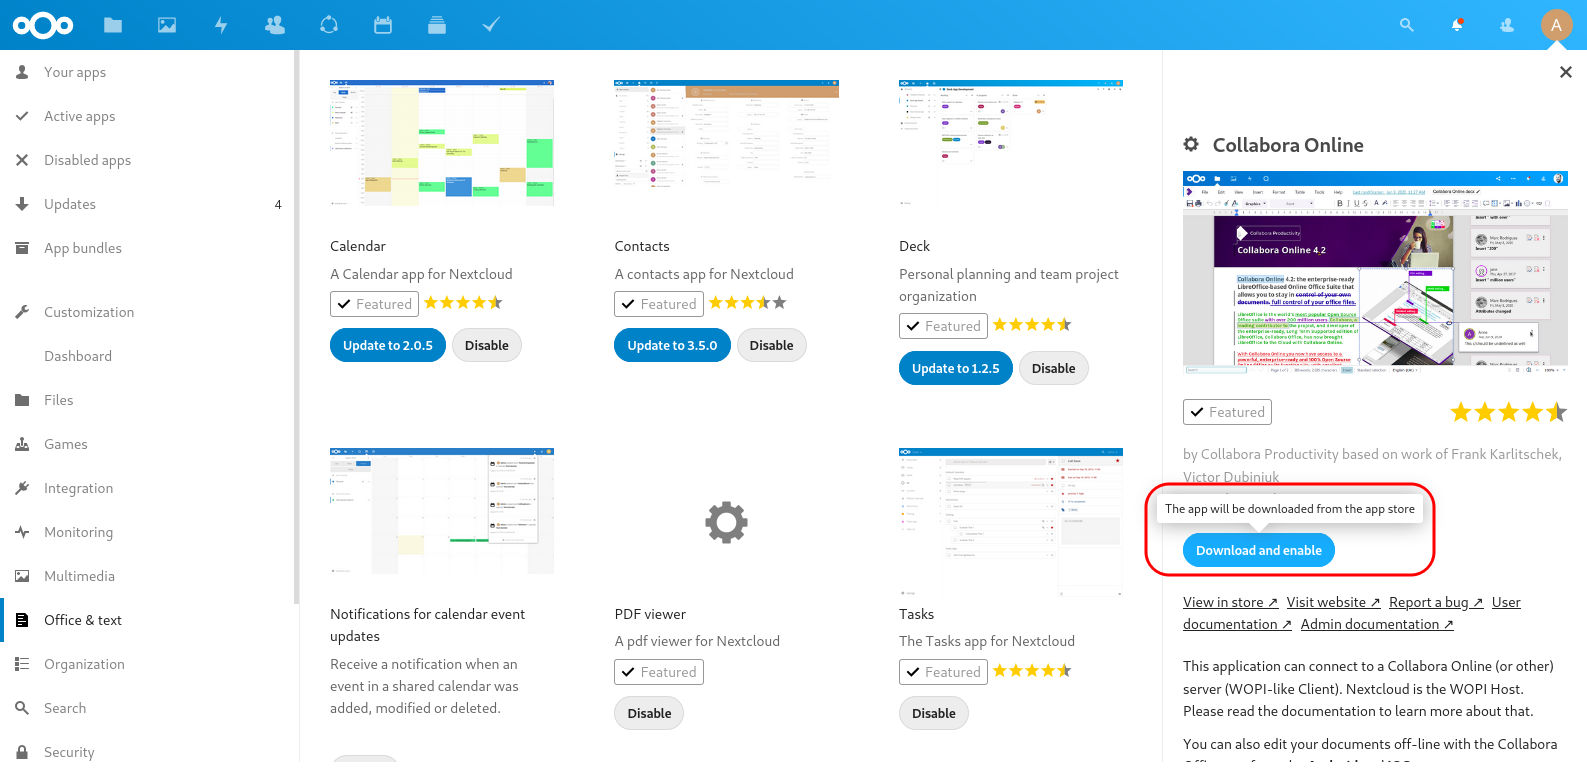
Once the installation process of LibreOffice Online is finished, it is necessary to install and configure the Collabora Online extension from Nextcloud. To activate it, visit the section Apps > Office & Text, as Nextcloud administrator.

Installation of Collabora Online at Nextcloud.
Once activated you will have to go to Settings > Collabora Online (on the left menu) and insert the application installation url with ‘https://'. In the case of our example, ‘https://libreoffice.example.com’.

Setting up Collabora Online.
From now on, every time you access a document from Files, it will be opened in the browser for editing.
Note: It is installed the Collabora Online Development version, that is limited to a maximum of 10 open documents at a time and a maximum of 20 simultaneous connections.