Email
You can add an infinite number of email accounts for all the domains you have activated on your server. Before adding email accounts, it is important that you make sure you have correctly configured the corresponding domain. To find out, check out the domain configuration.
Create an account
In the section ‘Mail’ > ‘Mail Accounts’ , click on the button ‘Add a new account’ and fill in the different fields of the form that is displayed. In the field ‘Username’ you will have to insert only the name of the account (without @domain.com) and you will have to choose a domain from the list of available domains, which you will have previously activated in the section ‘Domains’. To create the account user@example.com you will have to insert ‘user’ in the field ‘Username’ and choose the domain ‘example.com’ from the drop down menu of the field ‘Domain’.
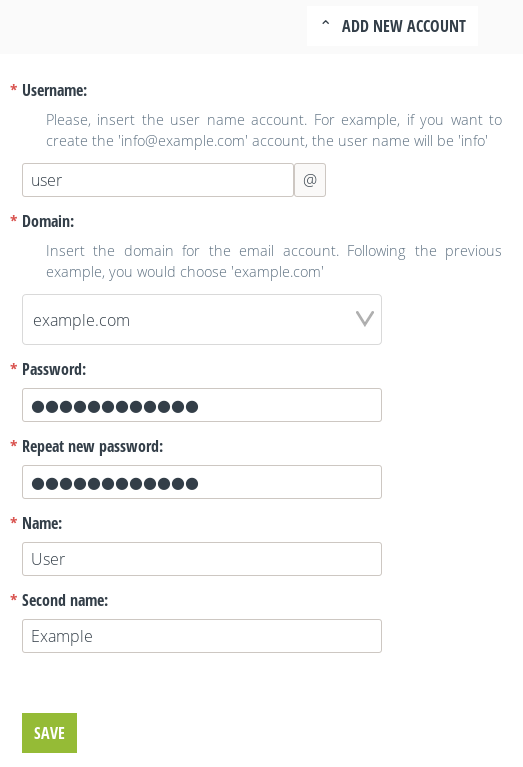
Creating an email account.
Editing an account
You can change the parameters of the email accounts you have activated by visiting the section ‘’*Mail’* > ‘Mail Accounts’ and then clicking on the button ‘Edit account’ corresponding to the account you want to modify.
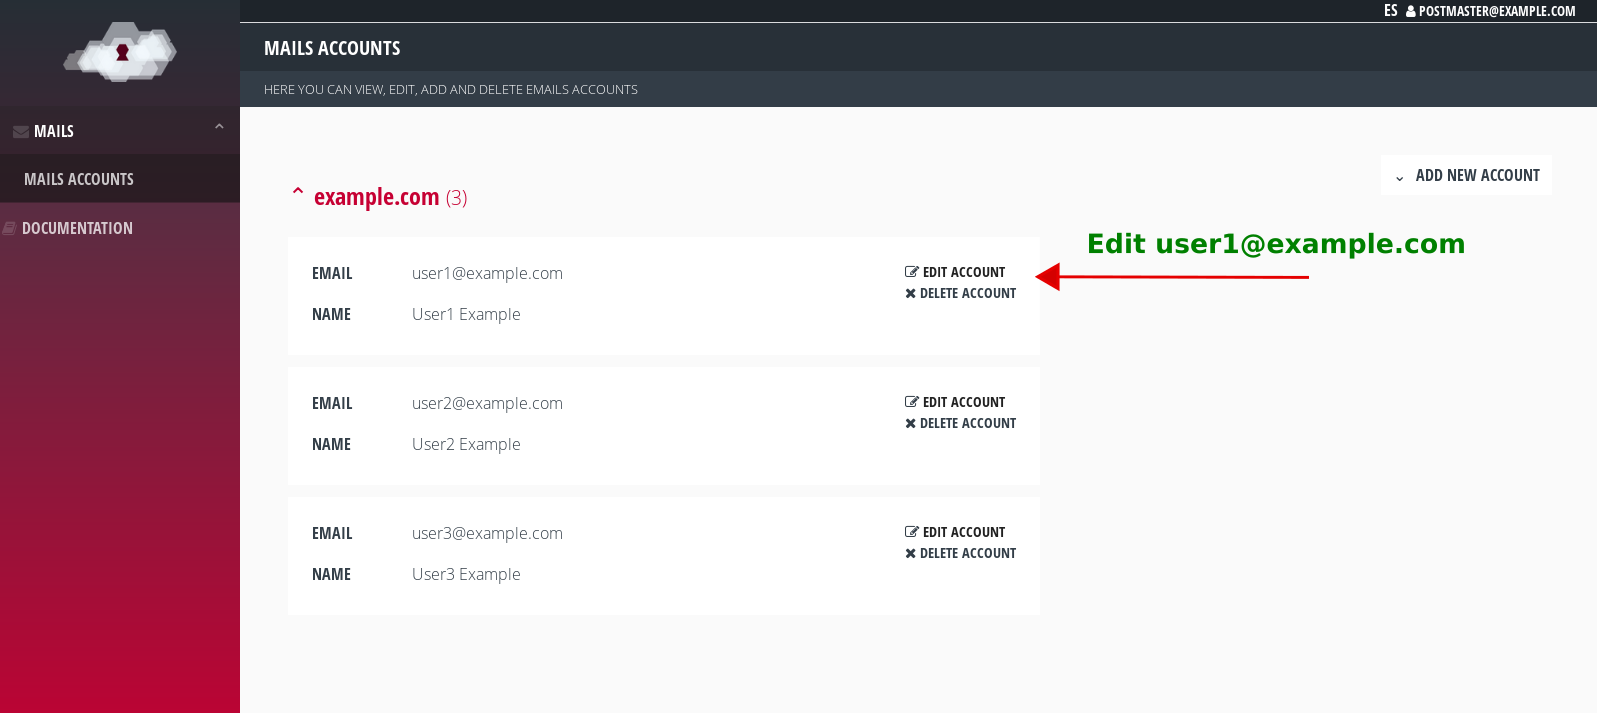
Editing an email account.
Automatic Forward and Automatic Response (Vacation)
On the same editing page of each email account you can enable automatic forwarding of all incoming mail to any other email address.
To do this, you have to check the box ‘Enable forward’ and insert a valid address in the new field that is displayed. In case you want it to forward to multiple accounts, you must separate each one with a comma (user1@example.com,user2@example.com). If you want to continue receiving a copy of incoming mail to your current account, you will need to include it in the list.
To activate the automatic reply (out of office) check the box ‘Enable automatic reply’. In the field below ‘Automatic reply message’ insert the text you want to send.
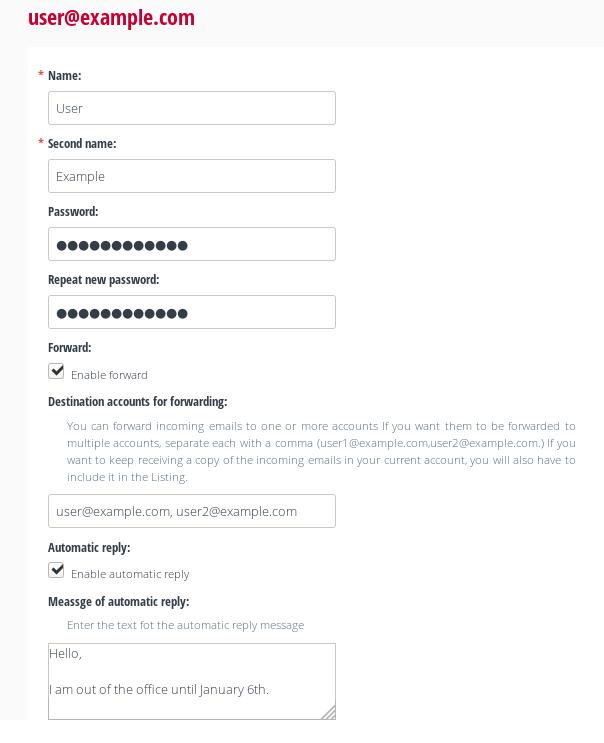
Settings for forwarding and automatic reply.
Delete an account
When you delete a mail account, the messages in its folders (received, sent, trash…) are not deleted and a copy is saved on your server. The account is deactivated, so you can no longer send or receive mail. If you create the same account again in the future, you will recover all the contents of your folders. To permanently empty an account, you can delete its contents using the webmail interface (if you have the application installed) or using an email client (Thunderbird, Outlook…) configured with IMAP. IMAP creates a synchronization between the client and the server, so that all actions performed on one of the two parts are reflected on the other.
Webmail - Snappymail
If you have installed the Snappymail application on your server, you can use this webmail application to check and send email from your browser. From the control panel itself you have direct access to the webmail application. Besides being able to use the address myserver.maadix.org/webmail, you can also use any of your own domains running on the server.
For example, if you have successfully configured the domain example.com, then you can visit the webmail interface by visiting example.com/webmail.
All email accounts successfully activated through the control panel can be accessed through the webmail interface, if Snappymail has been installed.
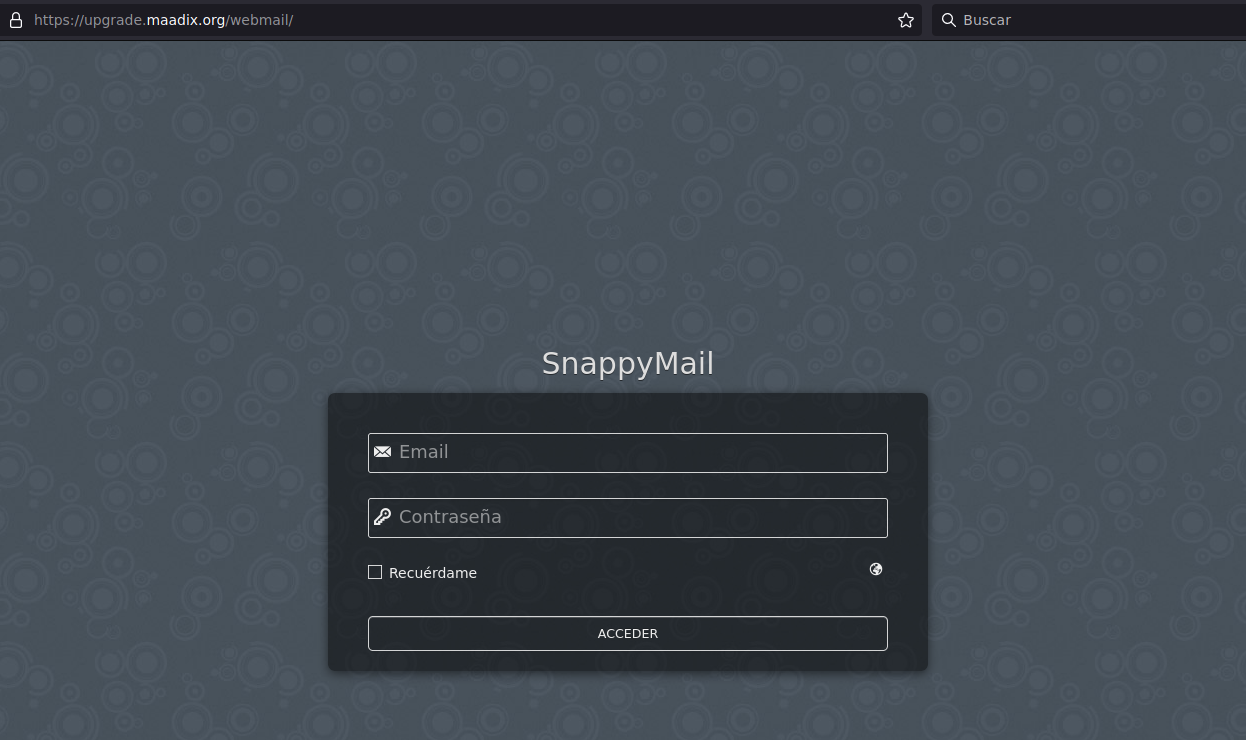
Access by webmail (Snappymail).
Note: the password assigned during installation is the password for accessing the Snappymail administration panel. To access each mail account through Snappymail, it will be used its specific credentials.
Snappymail admin access
- Access details:
Url:
myserver.maadix.org/webmail/?adminUser:
adminContraseña: la que asignaste durante la instalación.
In the Snappymail administration control panel you will be able to edit several settings. We recommend that you do not edit the settings for the domains, as they are automatically configured when they are added to the MaadiX control panel.
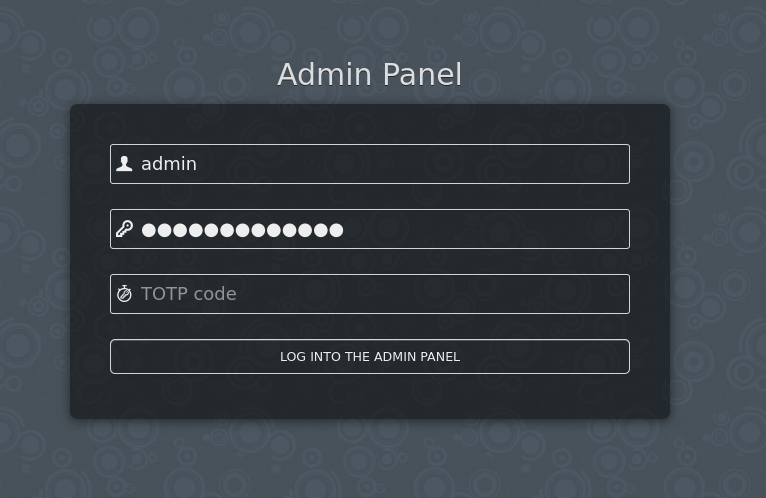
Access to the Snappymail administration panel.
Contacts on Snappymail
Snappymail’s Contacts functionality is very useful, allows you to have an address book and can be used when composing emails. To enable this functionality you only need to access the Snappymail administration panel (as explained in the previous section) and check the option ‘Enable contacts’ on the ‘Contacts’ section.
If you want to be able to synchronize contacts as well, you can check ‘Allow contacts sync (with external CardDAV server)’. How to synchronize with the Nextcloud ‘Contacts’ app is explained below.
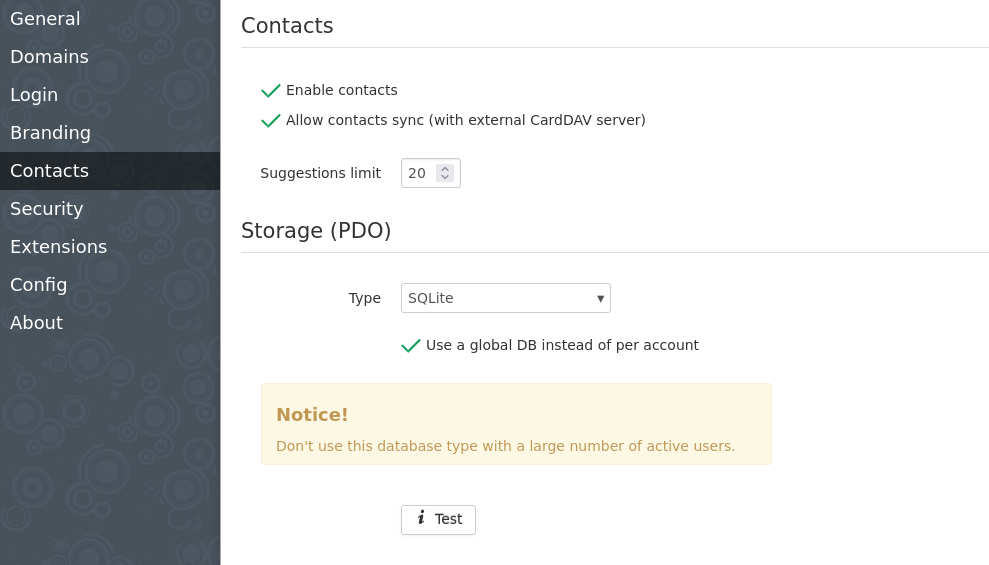
Contacts settings on SnappymailSnappymail administration panel.
In addition, the contacts functionality can work with SQLite or with MySQL, in the drop-down menu you can select the option you prefer.
If you choose to use SQLite you only need to press the test button to check that Snappymail can write the contacts to the database and that the configuration is correct. As it is warned in the message, it is not recommended for a large number of users.
If you choose to use MySQL, you will have to take a few more steps. It will be necessary to access through SSH to the server, create a database and a user of MySQL with permissions to write on it. If you have no experience with MySQL you can follow the next steps:
(Having logged in through SSH with the Superuser account)
Accessing MySQL
sudo mysql
Create database and user with write permissions
CREATE DATABASE snappycontacts;
GRANT ALL PRIVILEGES ON snappymail.* TO 'rainloop'@'localhost' IDENTIFIED BY 'password';
FLUSH PRIVILEGES;
exit;
Ahora habrá que indicar estos datos en el panel de administración de Snappymail, como se ve en la siguiente imagen.
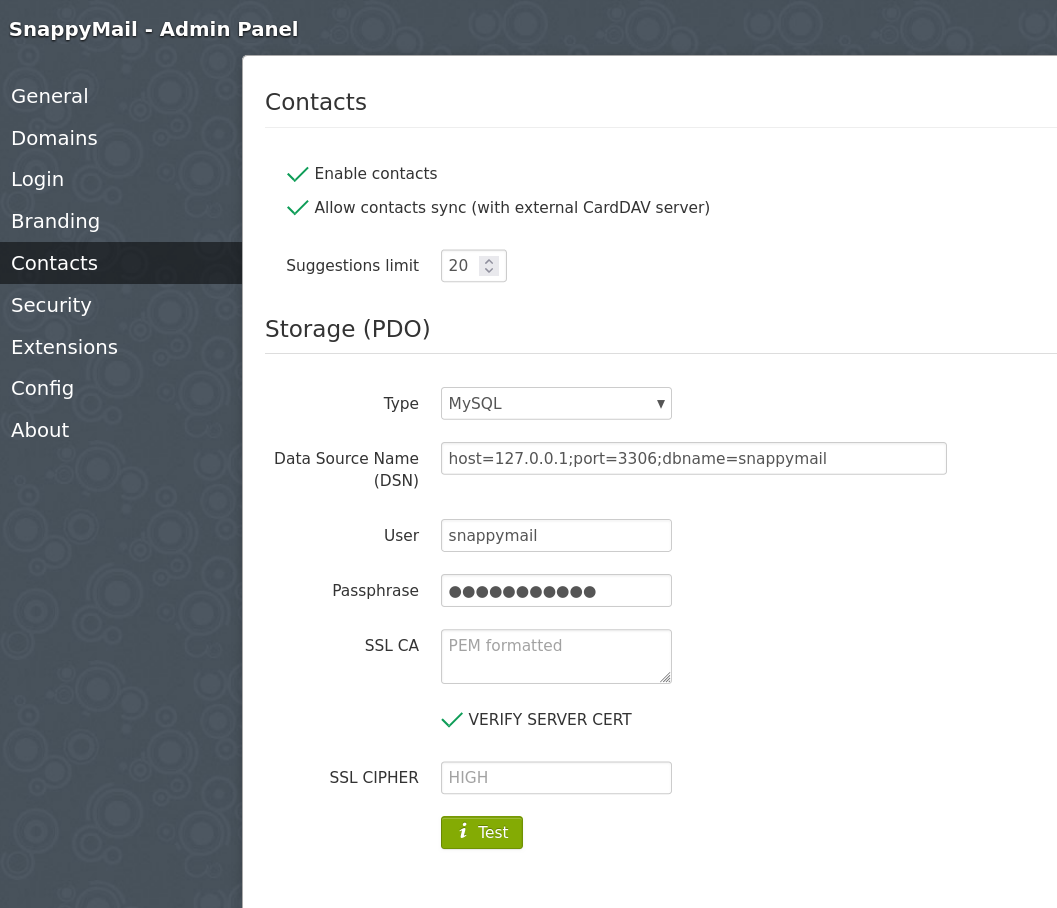
Contacts set up with MySQL.
Press the ‘Test’ button to check that the settings are correct.
From now on, the email accounts that are accessed by Snappymail will also have an address book.
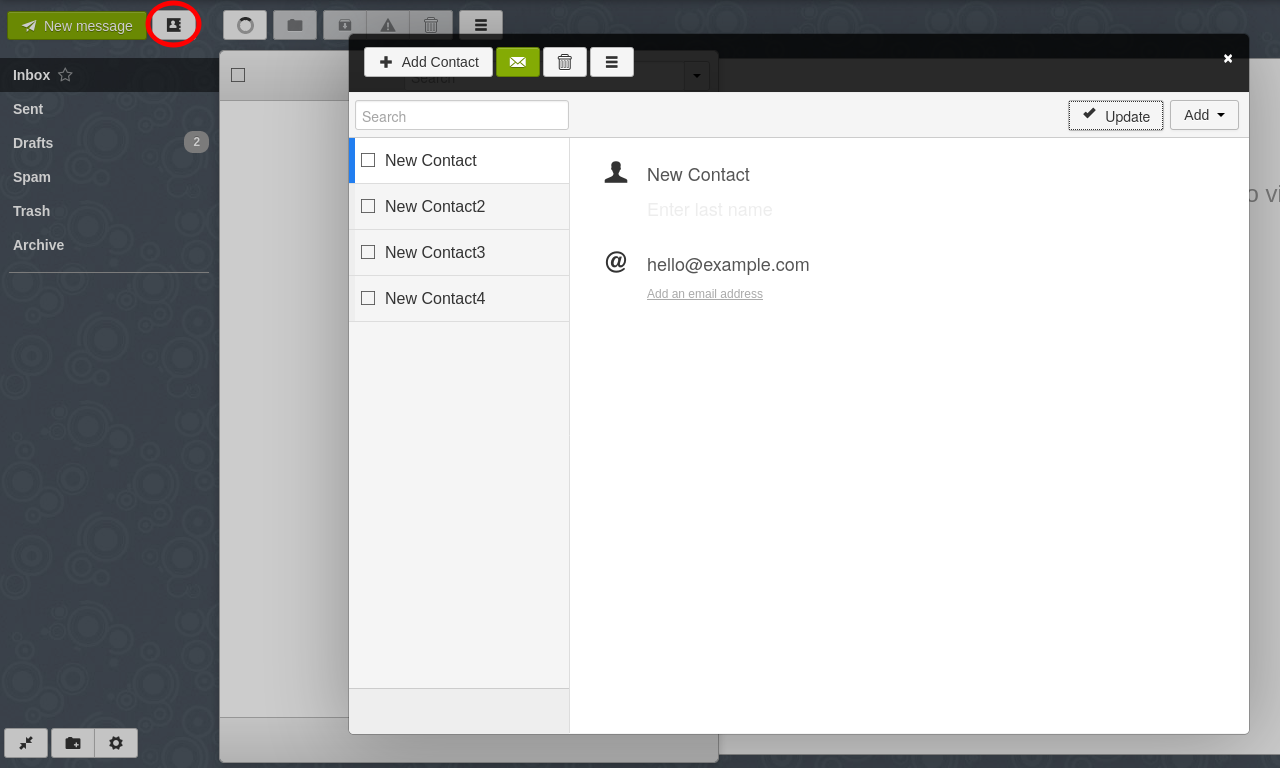
Libreta de direcciones en Snappymail
Migrating from Rainloop.
If you previously had Rainloop installed, in MaadiX release 202403 this application will be automatically replaced by SnappyMail. Rainloop will be disabled with no option to reactivate it. The applicationfiles will be preserved so that you can refer to your previous settings if you need to.
The only settings that MaadiX imports automatically are:
The domains enabled from the control panel
La libreta de direcciones SqLite que estaba previamente ubicada en
/var/www/rainloop/data/_data_/_default_/AddressBook.sqlite
You will need to manually recover any other custom setting.
If you activated another address book, for example with Mysql, you will have to manually reconfigure the connection parameters which can found in the Rainloop configuration file in /var/www/rainloop/data/_data_/_default_/configs/application.ini.
In this same file you will find all the other customisations you may have applied and you can retrieve them by copying them to the new SnapyyMail configuration file at /var/www/snappymail/data/_data_/_default_/configs/application.ini
Likewise, if you had any plugins enabled, you will need to manually reinstall them from the administration interface.
The password to access the Snappymail administration interface was set randomly at the time of migration. You can either reset it from the control panel under My Applications -> SnappyMail -> configure, or copy the one you where using to access Rainloop to access Rainloop, which you can find (hashed) in the above mentioned application.ini configuration file, in the line :
admin_password = "XXXXX"
Access to Snappymail will be available from both the old url (/rainloop) and the new one (/webmail).
Once you have checked that you don’t need to recover any other setting from the previous installation, you can delete Rainloop permanently from the My Applications -> View all tab of the Control Panel . We recommend that you first make a copy of the /var/www/rainloop/data/_data_/_default_/configs/application.ini file.
Email Client
MaadiX allows you to check your email using an email client you have installed on your computer (Thunderbird, Outlook…). In order to configure your account within the client, you need the server connection data, which you can find on Control Panel, on the section ‘Mail’ > ‘Mail accounts’ , on ‘Edit account’ of the account you want to configure, and clicking on the IMAP or POP3 button at the top right

Email client settings.
For example, in Thunderbird the configuration by IMAP will be like this:
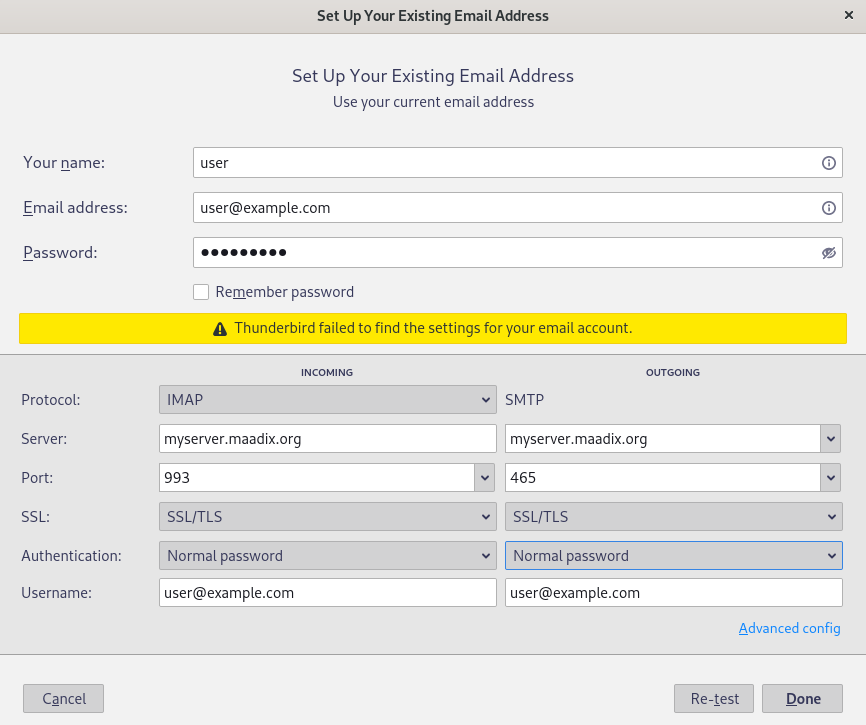
Settings example for Thunderbird.
Synchronizing contacts
There is the possibility of synchronizing your Nextcloud contacts in both Thunderbird (mail client) and Rainloop (webmail). The application ‘Contacts’ is not installed by default in Nextcloud, so proceed to install it, if you have not already done so.
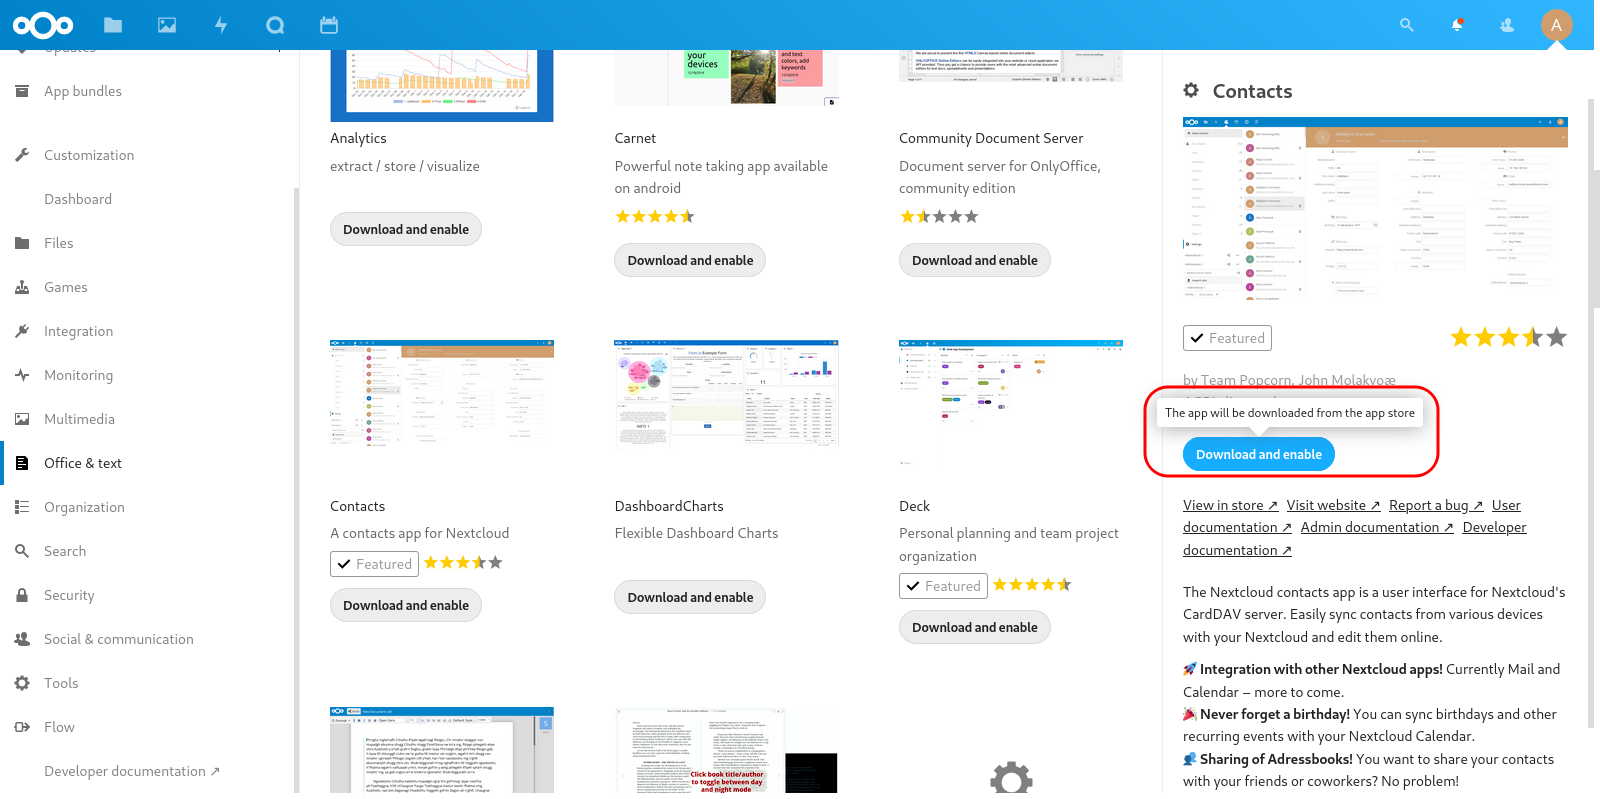
Installation of the App “Contacts” in Nextcloud.
Once you have your contacts added to the App ‘Contacts’, you will need the address book link to synchronize them. You can find it in Nextcloud, in Contacts > Settings > Three-Point Menu > Copy link, it will have the format https://myserver.maadix.org/nextcloud/remote.php/dav/addressbooks/users/user/contacts/`
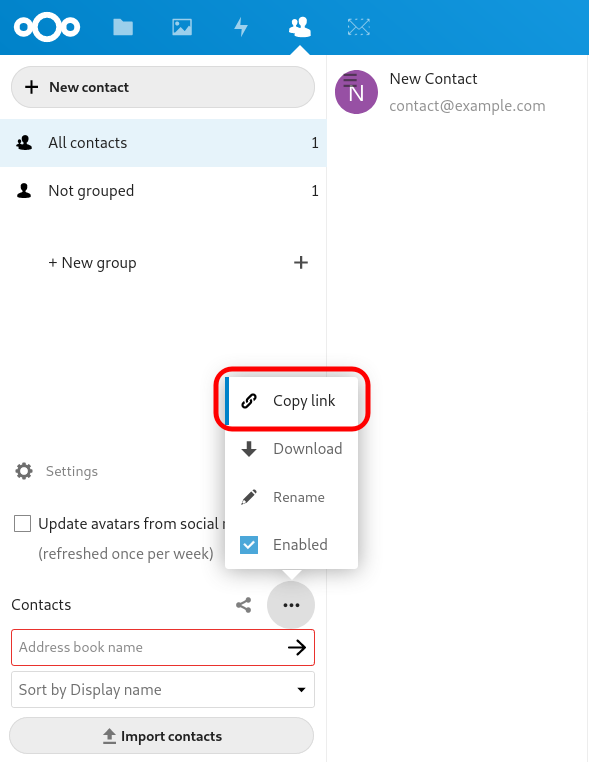
CardDav link.
On Thunderbird
To synchronize your Nextcloud contacts with Thunderbird you need the CardBook plug-in.
Once installed you can add a new remote address book of type CardDav as shown in the following screenshot, you will have to add the url of the Nextcloud address book which will have the format: https://myserver.maadix.org/nextcloud/remote.php/dav/addressbooks/users/user/contacts/ in addition to the Nextcloud account name and password.
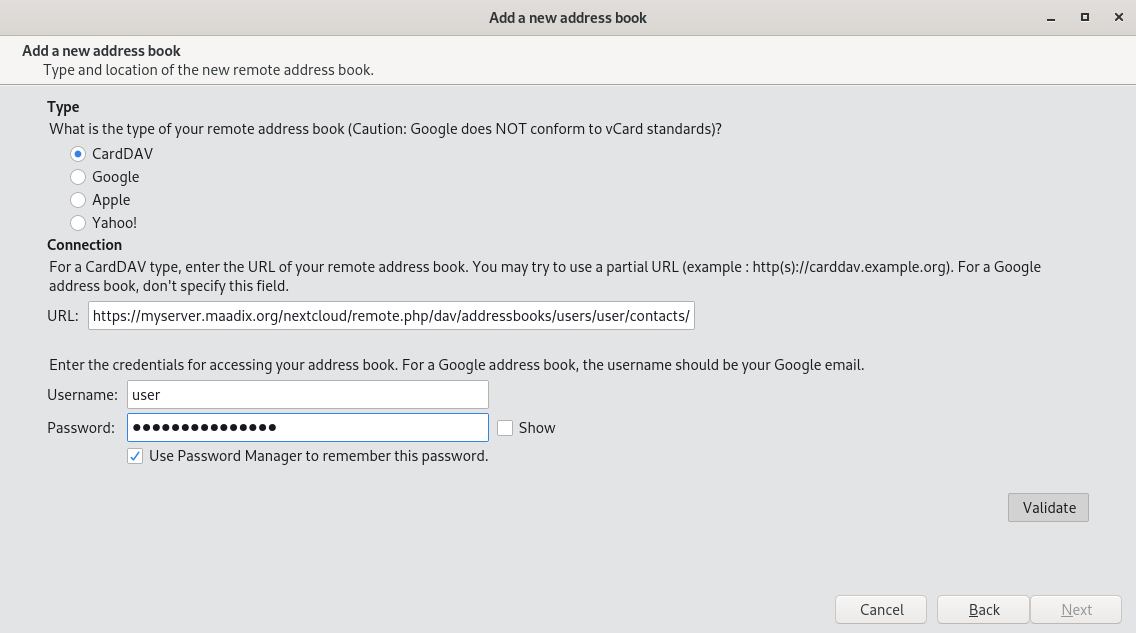
CardBook Settings.
En SnappyMail
Para sincronizar tus contactos de Nextcloud en Snappymail tienes que ir a ‘Configuración’ > ‘Contactos’ y en el apartado ‘Sincronización remota (CardDAV)’ activar la opción ‘Activar la sincronización remota’ y añadir el enlace de la libreta de direcciones de Nextcloud que tendrá el formato https://myserver.maadix.org/nextcloud/remote.php/dav/addressbooks/users/user/contacts/ además del nombre de la cuenta de Nextcloud y su contraseña.
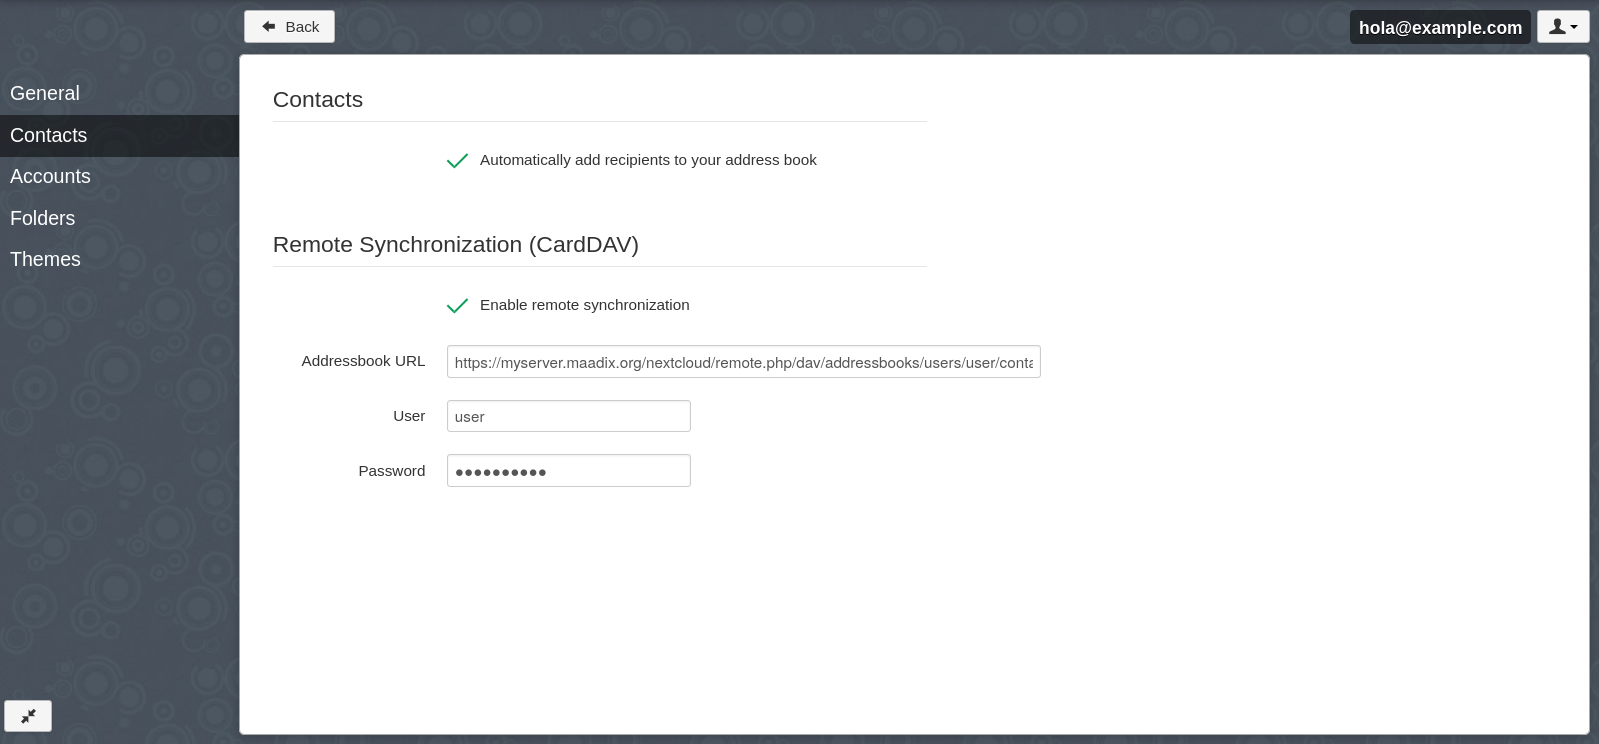
Settings for contact synchronization in Rainloop.
Remember that you must have previously activated the ‘Contacts’ functionality from the Rainloop administration panel (as indicated here) in order to display the settings related to contacts.
Once contacts synchronization is set up you can go to the address book and start synchronization, as shown in the picture below.
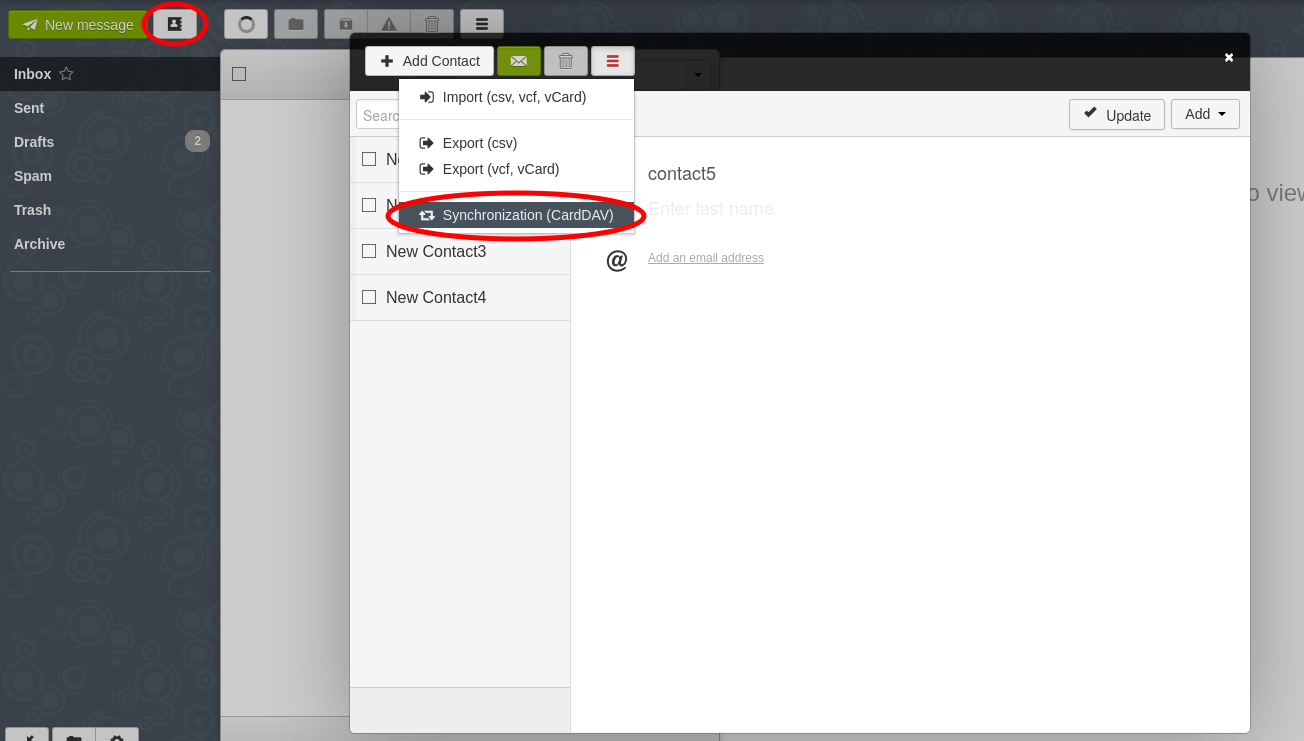
Contact synchronization on Rainloop.