Mastodon
Mastodon is a decentralised, open source microblogging social network that, thanks to federation with other instances, allows interaction with other communities.
Installation
Mastodon may require considerable disk space due to its operation. Therefore, depending on your usage forecast (number of accounts, number of videos, instance configuration, etc…) we recommend opting foran external S3 storage. This solution is not only cheaper, but also more efficient for managing large volumes of data.
The installation of Mastodon using the server’s internal SSD storage is disabled by default. This is because it could quickly consume the internal disk, affecting the operation of other applications. This measure aims to avoid installations that could compromise the server’s performance without you being fully aware of the implications.
While it is technically possible to migrate data from SSD to S3 later on, this process must be done manually and involves an additional cost. If you decide to install Mastodon using the internal storage, you will need to request to enable this option manually. Below, we provide instructions on how to to carry out both configurations.
Go to the Applications -> Install Applications section of the left menu of your Server Control Panel. In the list of available applications you will find Mastodon. You may not have enabled the checkbox to select it, as shown in the image below.
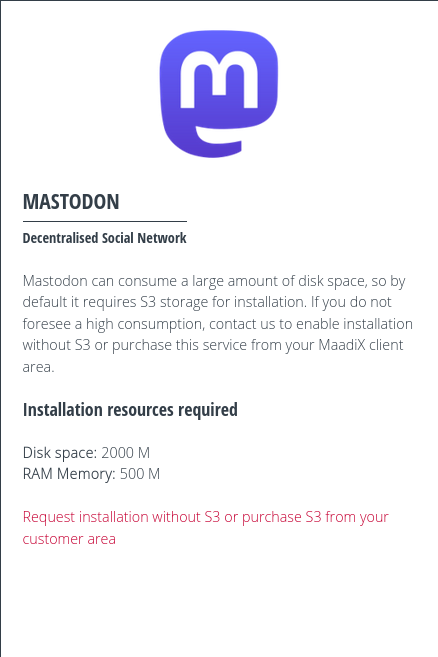
Disabled installation of Mastodon
In this case you have to decide what kind of installation you want: with S3 or with the server’s internal SSD disco
Use S3
To install Mastodon with S3 external storage, you first need to contract this service from your customer area. You will be able to add additional additional services for any of the servers you have contracted.
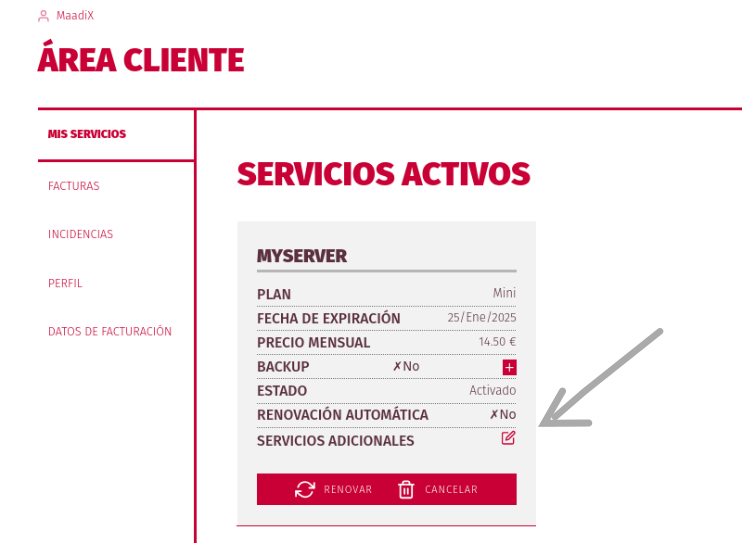
Add S3 to the server
By clicking on the corresponding icon, you will have the option to choose the S3 plan that best suits your needs, with the possibility to adjust it (increase or decrease) at each renewal.
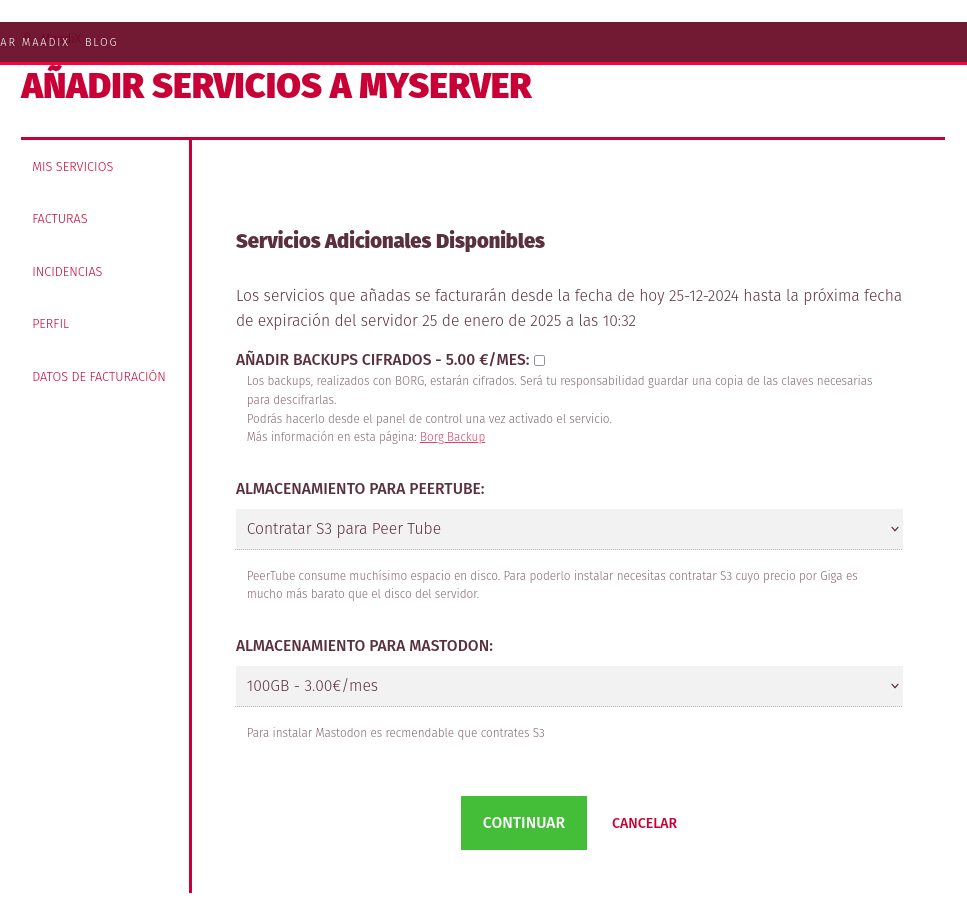
Choose S3 plan for Mastodon
Once the order is placed, the new storage space will be activated, a process that can take from a few minutes to a few hours.
When you receive the confirmation by mail that the S3 storage is enabled and operational, you will be able to continue with the installation of Mastodon from the Control Panel. Simply go to the Applications -> Install Applications and select Mastodon
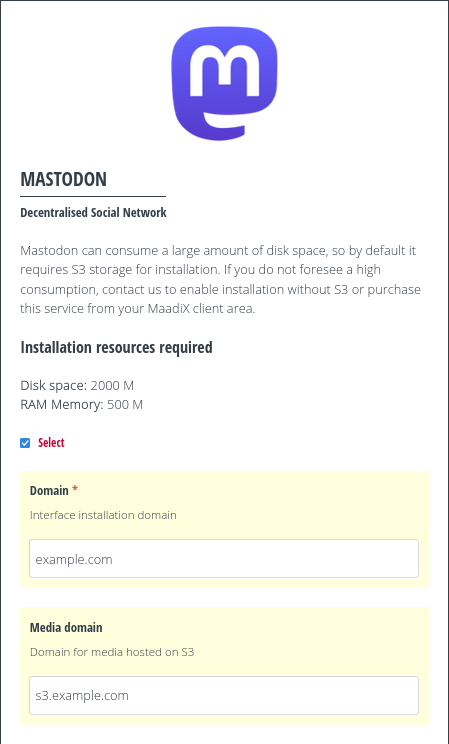
Install Mastodon with S3
During the installation process, you will need to enter two domains:
Domain or subdomain for the application: This shall be the main for accessing the Mastodon web interface and shall be visible in the browser.
Domain or subdomain for media: This shall be used to serve images, videos and other media stored in the S3 space.
Both domains have to be pointing to the server’s IP address. To do this, you will have to add two A records in the DNS zone editor of your domain (external operation to MaadiX). You can consult this page for more information on how to create DNS entries needed.
After configuring these parameters, click on “Install”.
Use SSD
To install Mastodon so that it uses internal SSD disk storage, you must first request that this option be enabled. You can do this by opening a ticket from your customer area or by sending an email to the MaadiX support account.
Once enabled, you can proceed with the installation. During the process, it will be necessary to indicate the domain that will be used to access to the application. This domain must be correctly configured to point to the IP address of the server.
To do this, you will need to add an A record in the DNS zone editor of your domain, which is an external operation to MaadiX.
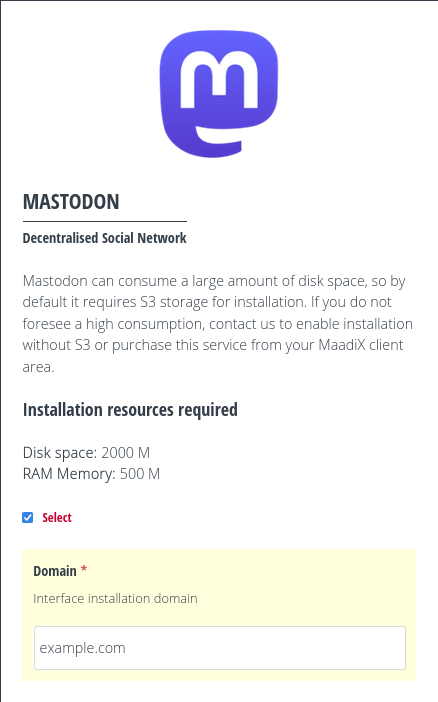
Instalar mastodon con SSD
Once enabled, you can proceed with the installation. During the process, it will be necessary to indicate the domain that will be used to access to the application. This domain must be correctly configured to point to the IP address of the server.
To do this, you will need to add an A record in the DNS zone editor of your domain, which is an external operation to MaadiX. You can consult this page for more information on how to create the DNS entries needed.
First Access
Once the installation is complete, you will receive an email with the data needed to access Mastodon. The installation creates an administration account with privileges to configure the instance and it’s options.To log in for the first time, you will need to use the password recovery function.
Configuration
After the installation is complete, it is highly recommended that you add the DKIM and SPF records to the domain’s DNS entries to prevent emails sent by the application (notifications, password recovery, etc.) end up in the unwanted folder or, in the worst case, scenario, being rejected.
From the control panel, go to My Apps → Mastodon → Configure. In the right-hand column, you will find the values you need to assign to the two DNS records. On this page you can find specific instructions for creating the DNS entries: create the DNS entries for mail.
In terms of editing, the only configurable parameter is the domain for the media in S3. On the other hand, the main domain of the application cannot be securely modified afterwards, as it acts as the unique identifier of your server within the network. This This is a delicate operation that must be done very carefully and manually.
From the graphical interface of the application you will be able to invite people to join your new instance and edit the available parameters such aspolicies for the registration of new accounts, federations, etc…
- More details can be found in this page: